Git and Github
Git and Github
Resources
- To learn more about using git with R, check out happygitwithr.com
This tutorial draws heavily on the website happygitwithr.com To learn more about using git with R, please visit the website, which covers introductory materials in greater details and guides new users through more advanced topics.
Git Basics
Git is a version control program, so you can avoid…
analysis.R
analysis_v1.R
analysis_v2.R
...
analysis_FINAL_v2c.R
Data analysis projects
- Contributions from multiple people
- Many rounds or revisions
- Require weeks/months
- Vulnerable to devastating loss/failure
Fundamentally, git is about “version control”. Data analysis tasks are often long-term efforts. They usually require input from multiple people and many rounds of revisions and additions. This makes it difficult to remember what changes were made at one time by which person and for what reason. We need something that can help us keep track of everything.
Git Basics
Version control can help
- Detailed, permanent record of changes
- Tracks changes and allows users to view or restore older versions
- Helps avoid devastating loss/failure
- Can be private or public
Version control creates a detailed, permanent record of this process. This helps to avoid devastating loss/failure and allows by tracking changes and allows users to easily view (or restore) older versions.
Git is a version control system that helps manage changes to data, code, and other documents necessary for data analysis.
GitHub, on the other hand, is a web-based platform that hosts Git repositories. It also adds its own features, including graphical interfaces and features for managing projects. GitHub provides a central location where data analysts can publish their repositories and collaborate with others. GitHub also allows analysts to keep repositories private, if data is sensitive or proprietary.
Git Basics
Each project is a repository (repo)
- Data and code for projects are stored in a repo folder
- Repo is hosted locally as a folder on your harddrive, and remotely on github.com
- Make changes locally, record them as a commit, push them to the remote version
- Share repo with collaborators; pull changes made by others from the remote version down to your local copy
- Synching is not live (like Dropbox)
Git revolves around folders called repositories (or repos). A Git repo is a virtual storage of your project, allowing you to save versions of your code and track changes made over time. It consists of all the project’s files and the entire revision history.
Data and code for individual projects are stored in a dedicated repo. The repo is hosted remotely on github.com and stored locally on your computer’s harddrive. Repos exist on your hard drive as a normal folder (usually within a larger folder that includes all active git repositories you are working on). Users make changes locally, record them as a “commit”, which is a record of any changes you have made, and “push” them to the remote version - Users can “pull” changes made by others from the remote version down to their local copy
Git Basics
Usage
- Edit files using your preferred software (RStudio, VSCode, MS Word, etc.)
- When you’re done, record the changes as a commit, push them to the remote version
Collaboration
- Precise record of who makes changes
- Simultaneous editing can cause challenges
Git works mostly in the background - Before you start working, pull any changes that exist on the remote version but not on your local copy - Create/add/edit/delete files as you normally would if you were not using git - For example, you can edit files containing code by using RStudio or VSCode, or create or edit a spreadsheet using Excel - Once you’ve accomplished a task or want to walk away for the day, record the changes you’ve made (which we’ll cover below) and then push your changes to the remote version Collaboration - Git is great for collaboration because it keeps precise track of who has made changes - However, simultaneous editing of the same file can cause challenges, and beginners should avoid doing so
Git Basics
Essential commands
git pull origin maingit add .git commit -m "describe your changes or vent frustration"git push origin main
Beginners only need to know a few commands; in this tutorial, we’ll use a software client that implements these commands for us using easy point-and-click software - Main refers to the man version of the repository (advanced users might create multiple versions, or branches, of a repo, but we don’t need to worry about that here) - Start a work session by using pull to get any updates (aka “commits”) that were pushed by a colleague (or by you on a different computer) - Use add to tell Git that you have made changes that you want to record - Use commit to record those changes and write a brief message explaining what you did - Push your commit(s) to the remove version on Github.com
Git Basics
Git can be complicated
- Often used for sophisticated software development
- Branches, conflicts, merges, rebase
- Massive online community to guide new users
While the basic functionality of git is important for data analysis projects, it is important to note that it is often used by large teams developing very sophisticated software, and has many features aimed toward more complicated use. Luckily, there is a massive online community that can help guide new users through the process of using and learning
Creating a Github account
Create an account for yourself or your organization
- Go to github.com
- Click “Sign-up” (top right)
- Pick a username (ex. jrspringman)
- Follow the instructions
Signing up for github is free, you just need to visit github.com and follow the instructions Make sure to pick a username for the account. This is like a social media handle that will allow others to find your data analysis projects online If you plan to use git as a team, you may want to create one account for your organization, while all colleagues that will interact with repos hosted on the organization account should create personal accounts
Installing git
- Open the terminal/command prompt
- Check if you have git installed
git --version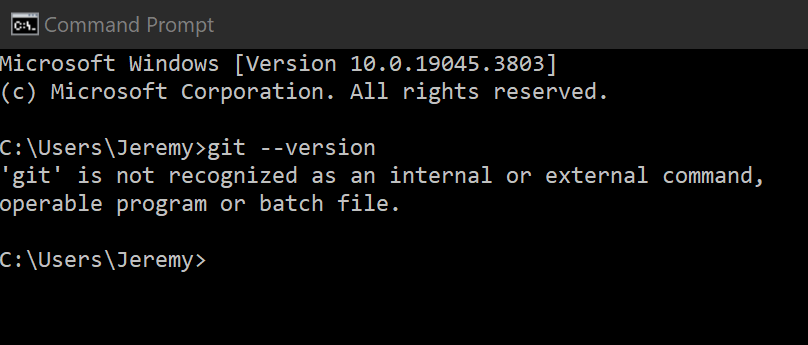
Once you’ve signed-up for a Github account, you need to install git on your machine - Begin by checking to see if you have git installed - Open a terminal window (aka command prompt); you can search for “terminal” on Windows or Mac - Type git –version into the prompt and hit Enter - If you don’t have it installed, you’ll get an error that looks like this
Installing git
If no, install git
- Mac should offer to install it for you
- Windows visit gitforwindows.org, click “Download”, then double-click the
.exe
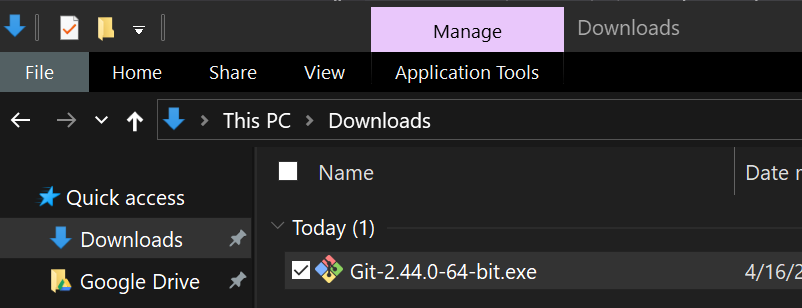
If you don’t have Git installed, Mac will offer to install it for you. Just click Install - If you are on Windows, you will need to install yourself by visiting gitforwindows.org - Click “Download”, which will install an exe file on your harddrive. Double-click the exe file and follow the instructions
Installing git
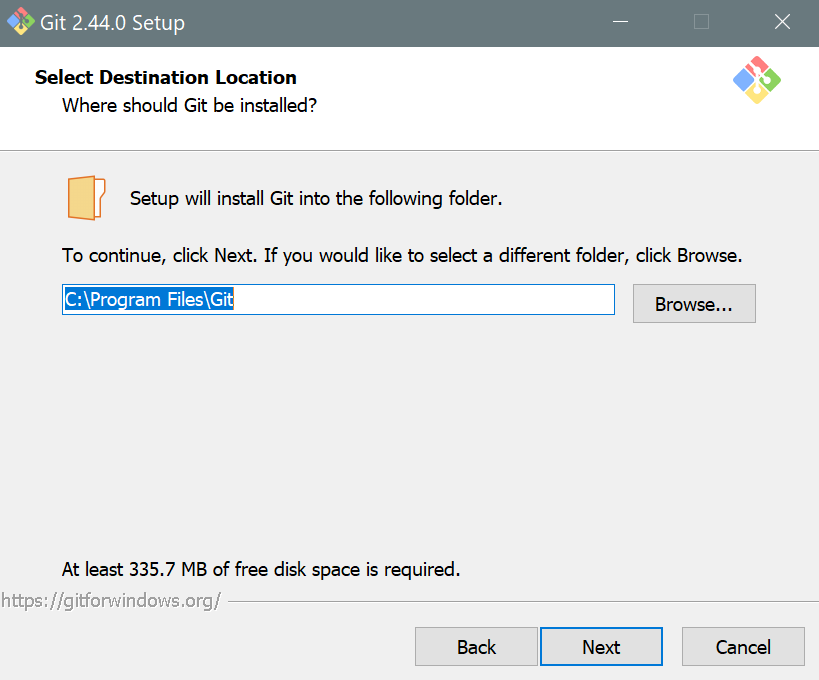
Once you double-click the exe, a prompt will open. Proceed through the next few steps
Installing git
Optional: Override the default branch name (select ‘main’)
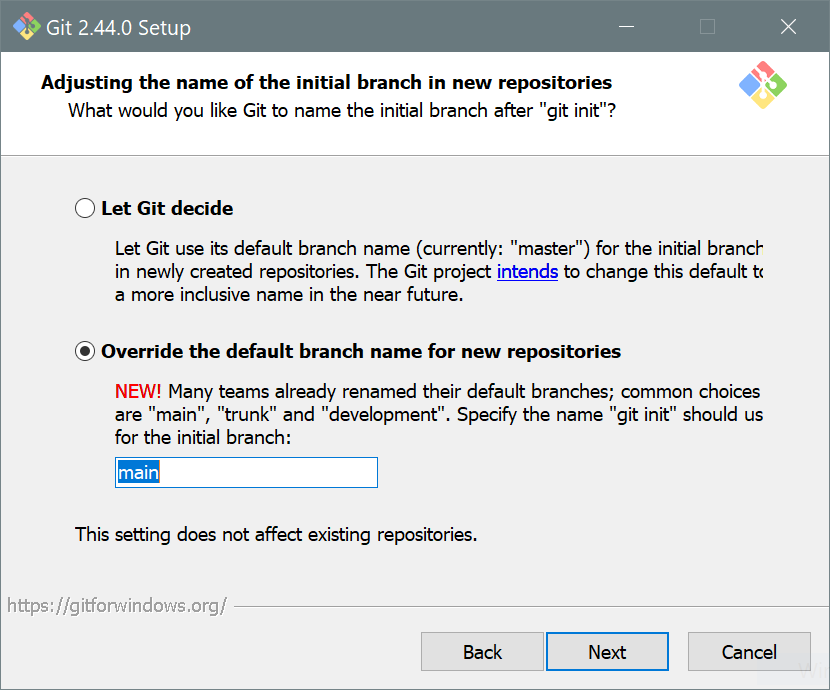
Although this is optional, most users prefer to call the primary branch main rather than master (default)
Installing git
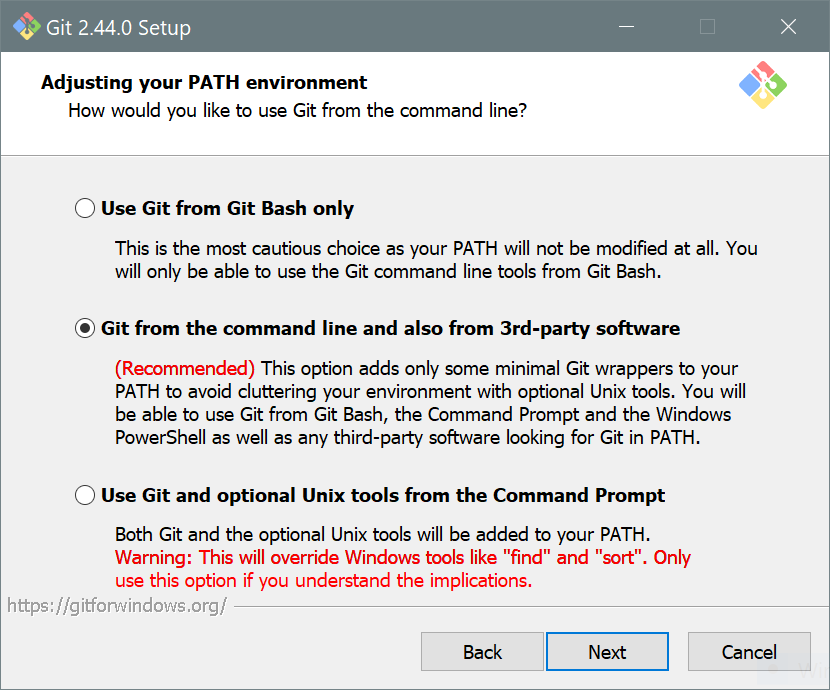
Make sure that “Git from the command line and 3rd-party software” is selected
Installing git
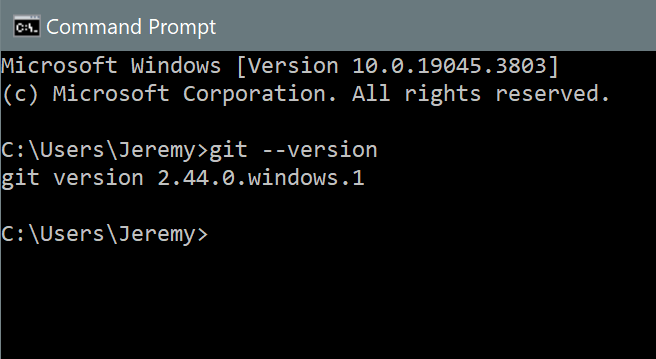
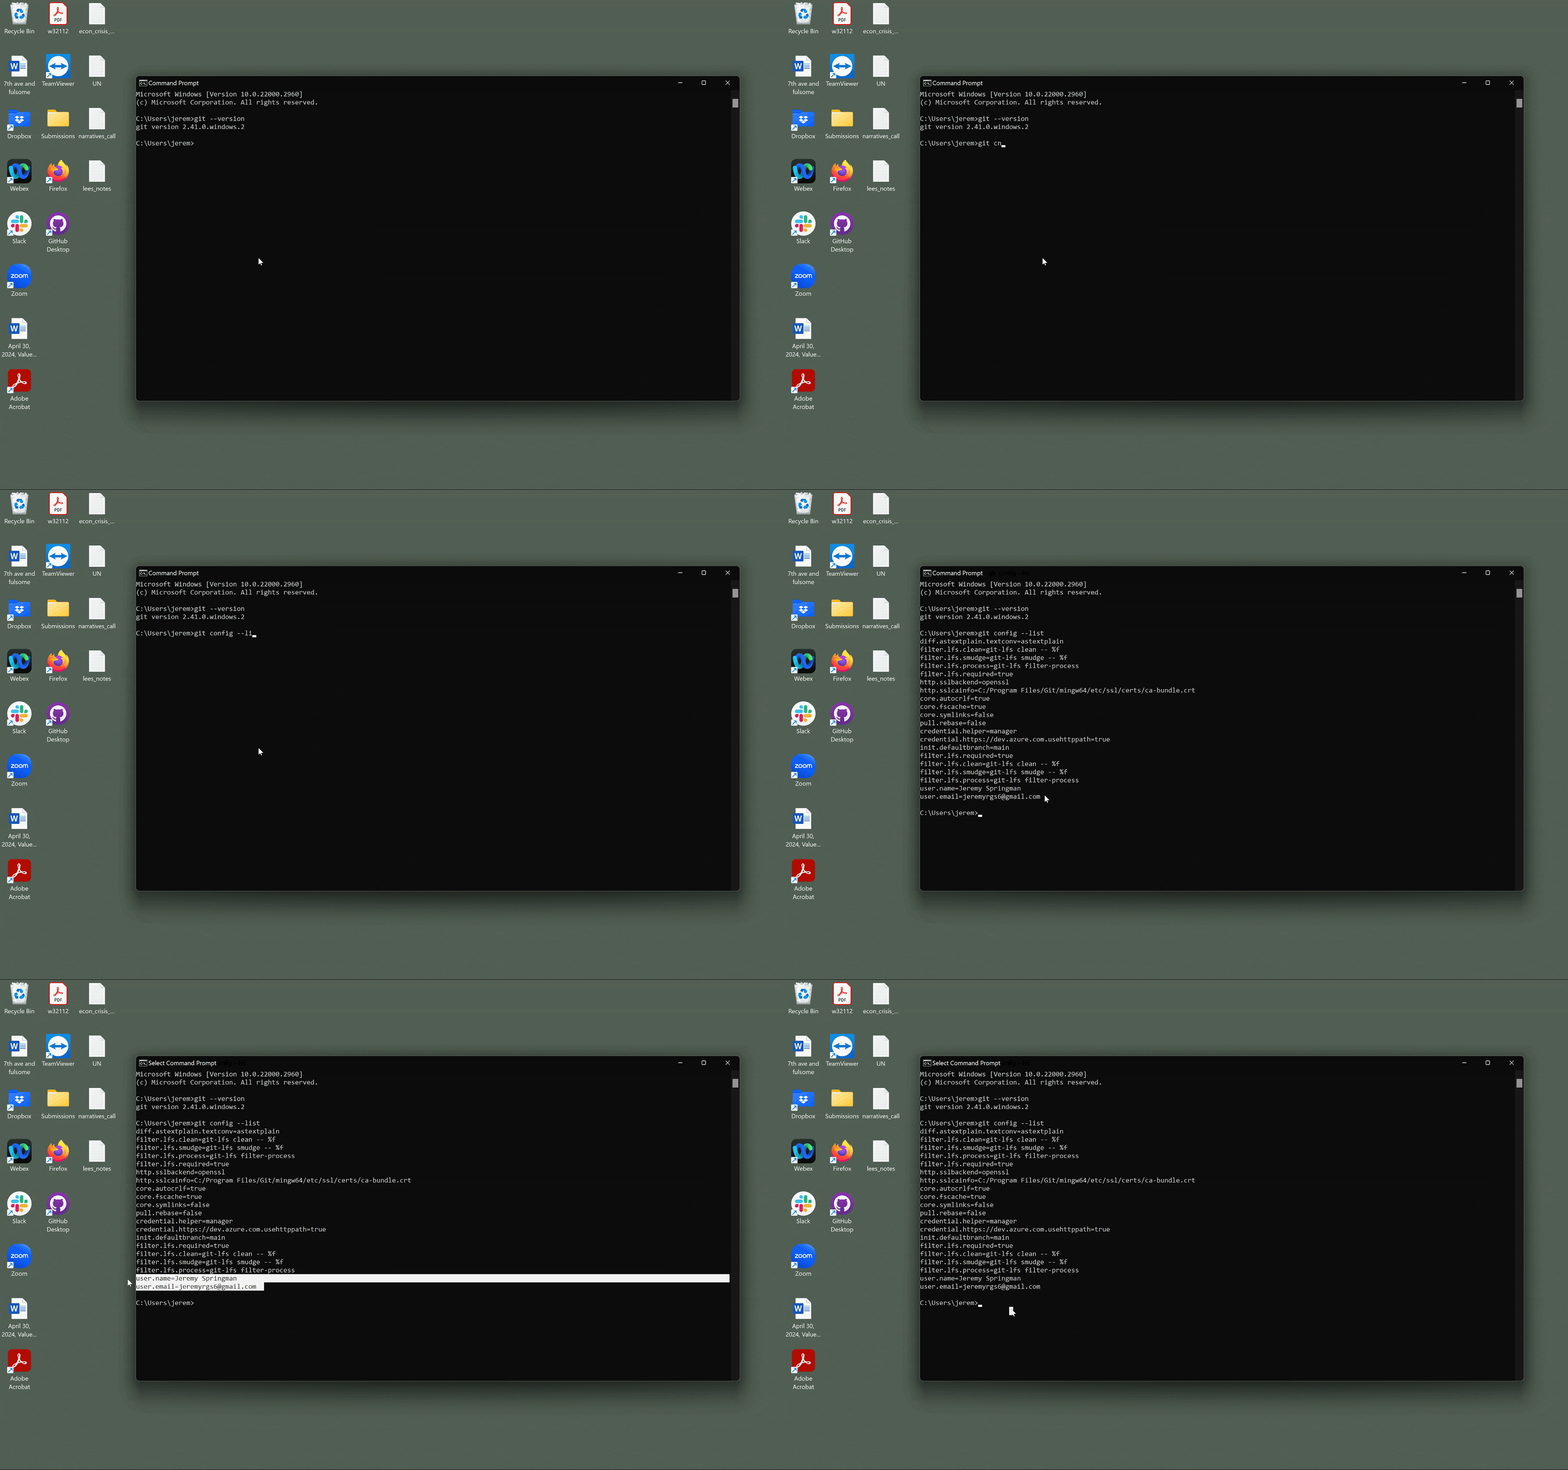
Now open a new command prompt and type git –version again - This time, you should get a response that indicates a version of git is installed on your computer
Installing git

Connect your GitHub account
- Open the terminal and enter the code below
- Replace
"Your Name"and"yourname@email.edu"with your name/email used to sign up for GitHub - Run the code
git config --global user.name "Your_user_name"
git config --global user.email "youremail@email.edu"
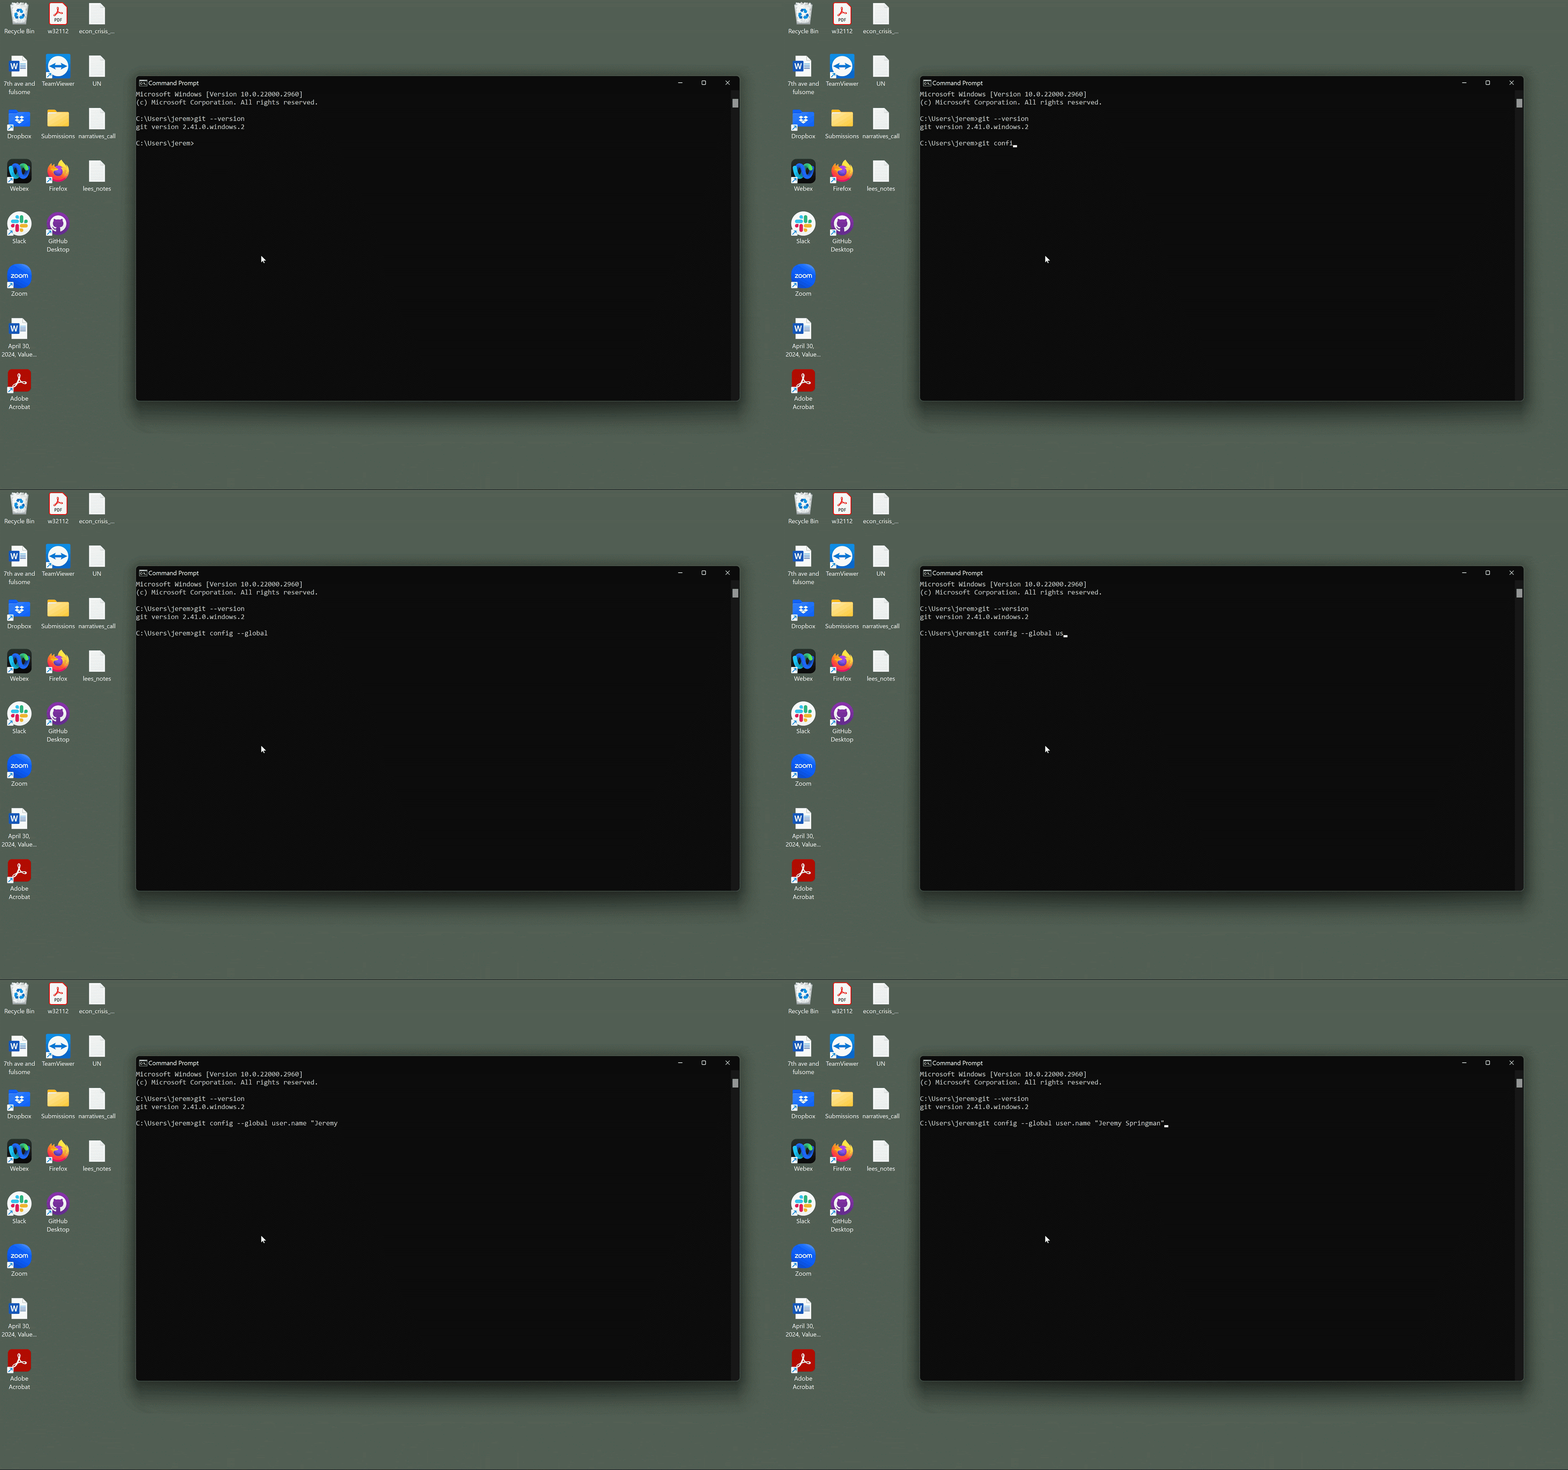
Now you need to connect your computer’s Git installation with your account on Github.com Type the following two commands into your terminal window, using the username and email address that you used to sign-up for a Github account
Connect your GitHub account
Connect your GitHub account
Check that the configuration worked
git config --list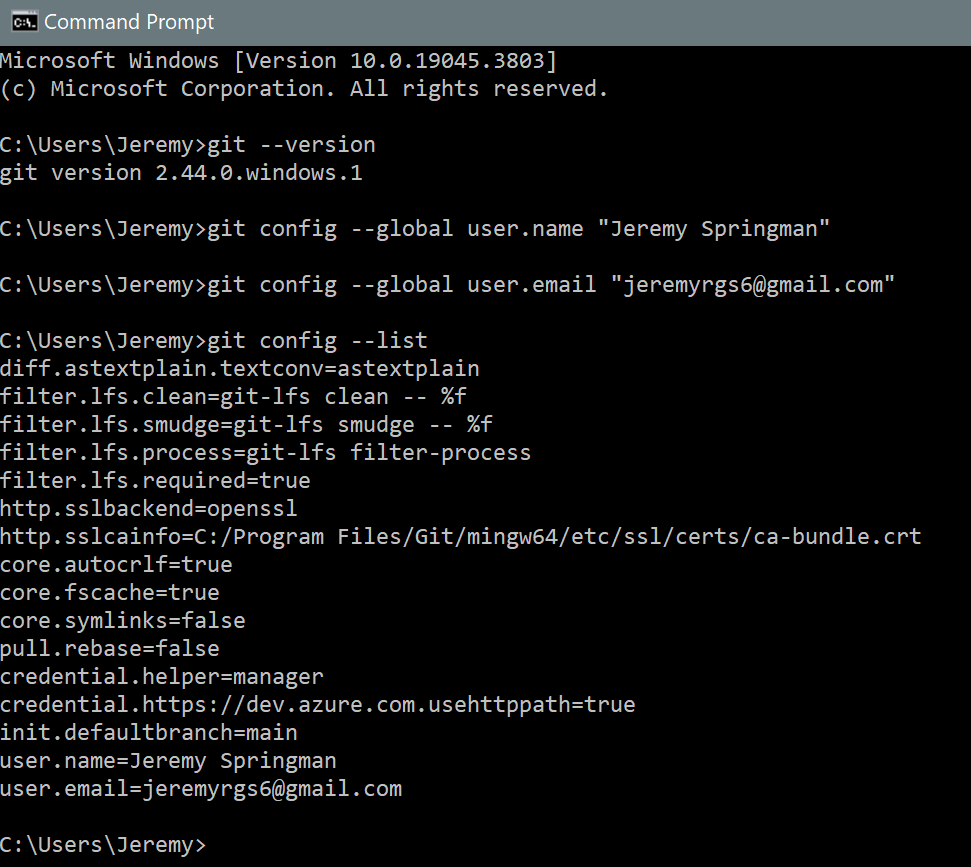
Check to see that the configuration worked. Depending on your operating system, the message you see might look different. If the configuration was successful, your username and email address will show-up somewhere in the message
The Git on your computer can now communicate with your account on Github.com
Connect your GitHub account
Install a git client
- Visit desktop.github.com and click “Download”
- Double click the
.exe
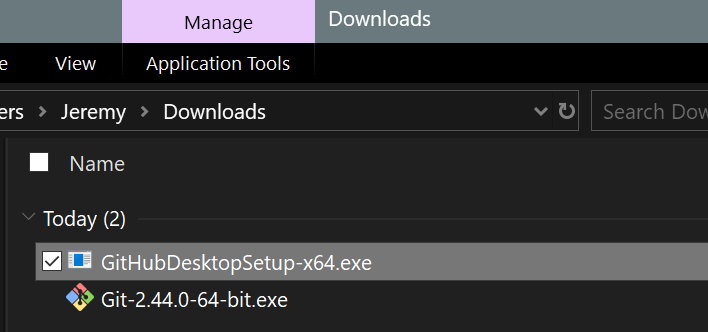
The next step is to install a Github client - The client allows you to more easily manage the process of pushing and pulling commits between your local copy of a repo and the remote version on Github.com - There are many clients you can use, but we recommend Github Desktop for most users because of its simplicity - Just visit desktop.github.com, click download, and then double-click the .exe file that gets downloaded to your computer
Install a git client
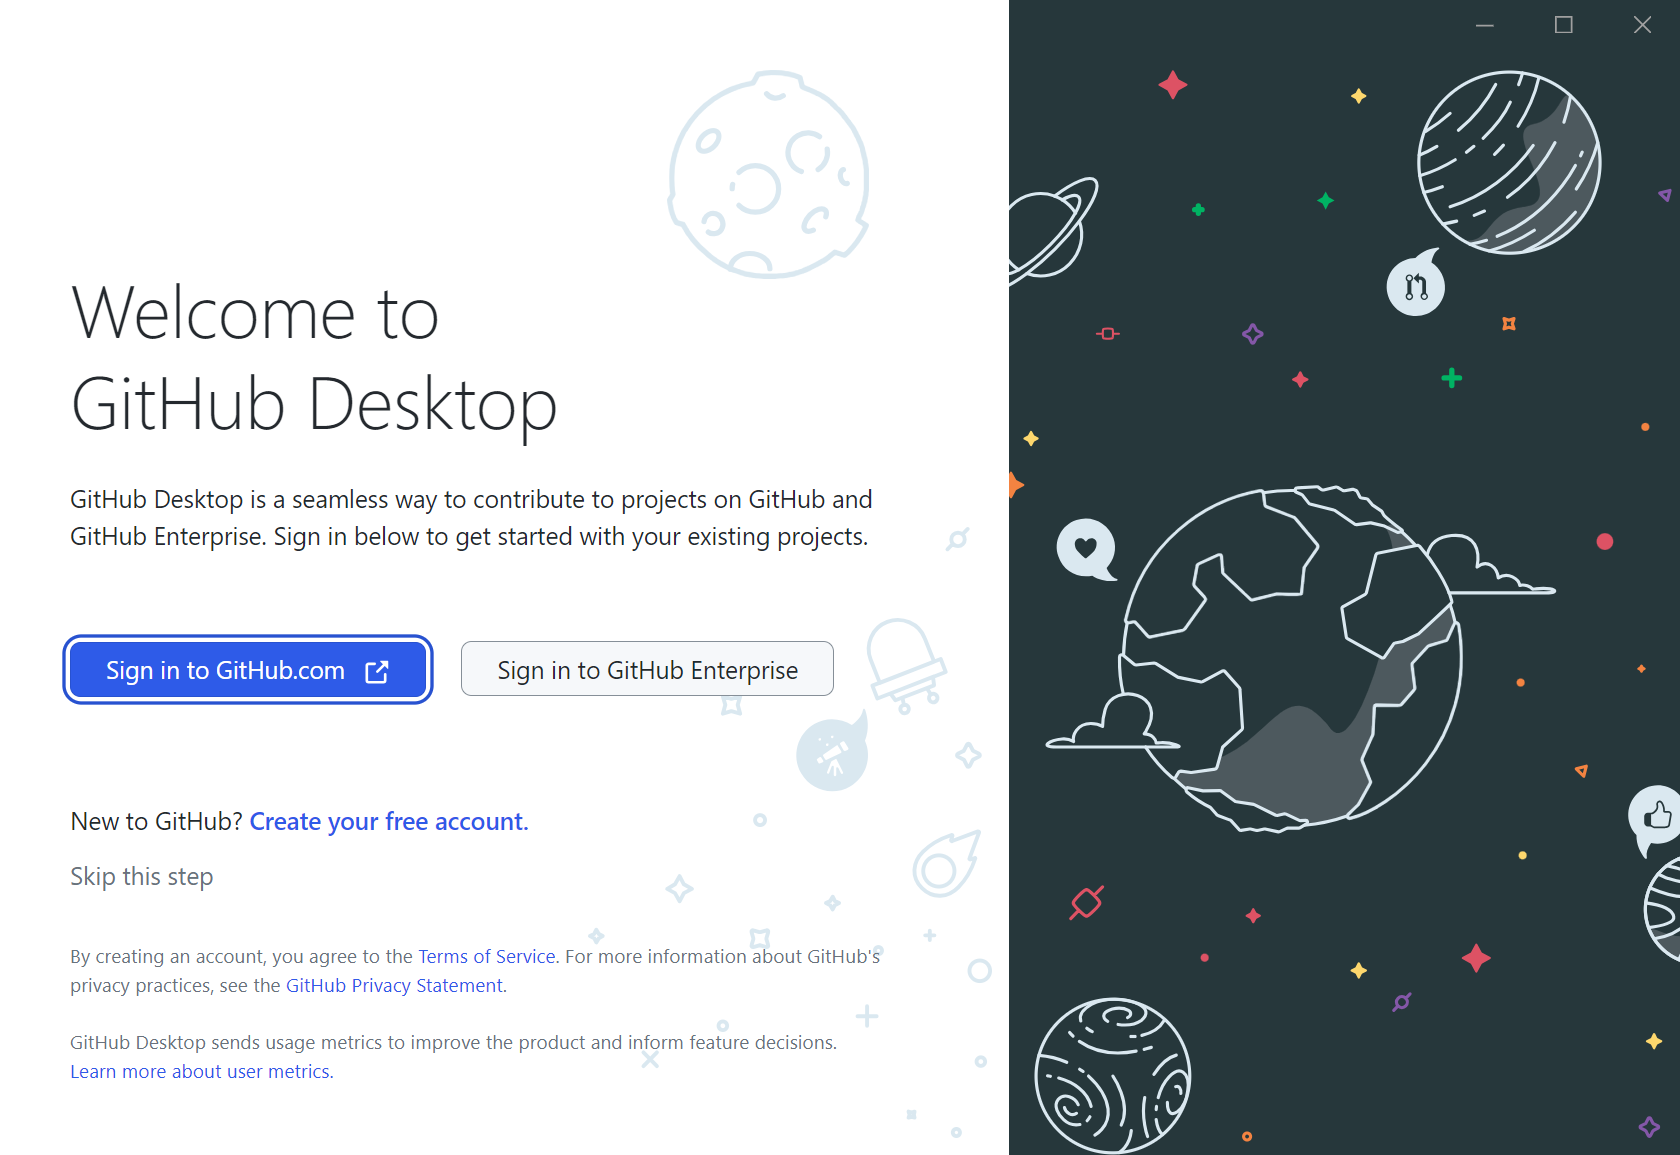
You will receive a prompt asking you to sign-in to your account on Github.com. Follow these instructions
Create a new repo
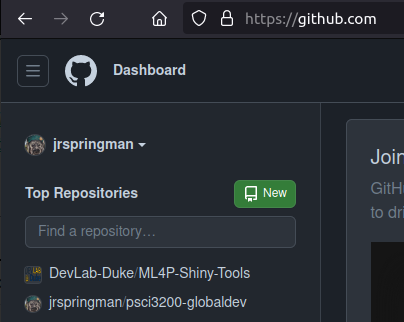
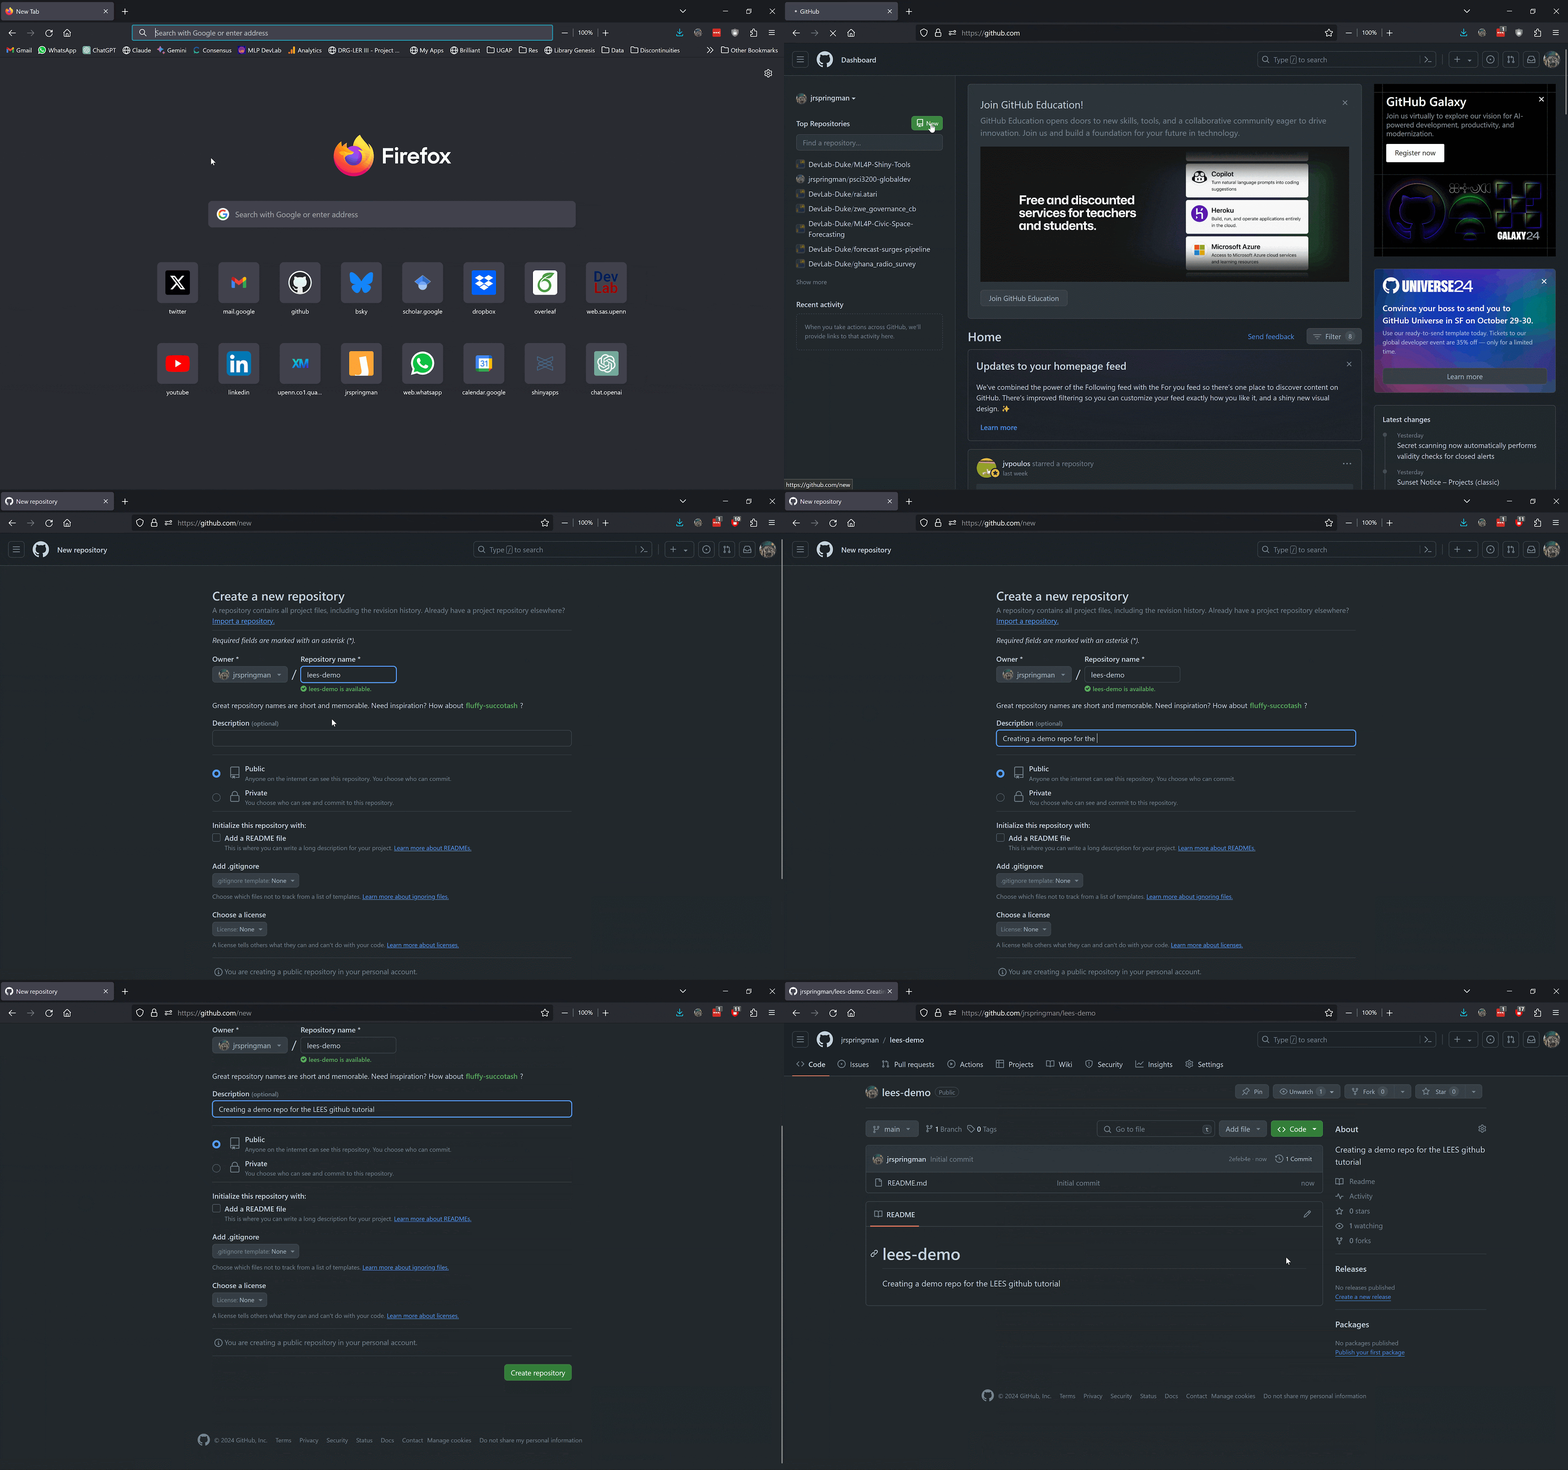
Sign-in to your account on github.com and click “New”
Create a new repo
Give your repository a name and make it public or private
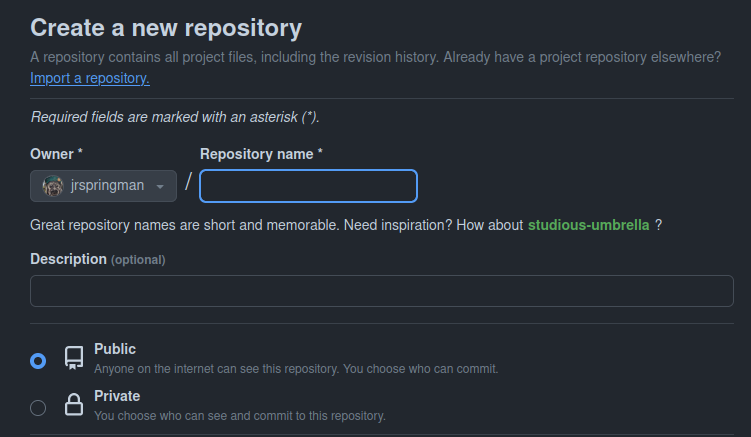
Create a new repo
Clone your repo
Open Github Desktop and “clone” the remote repo
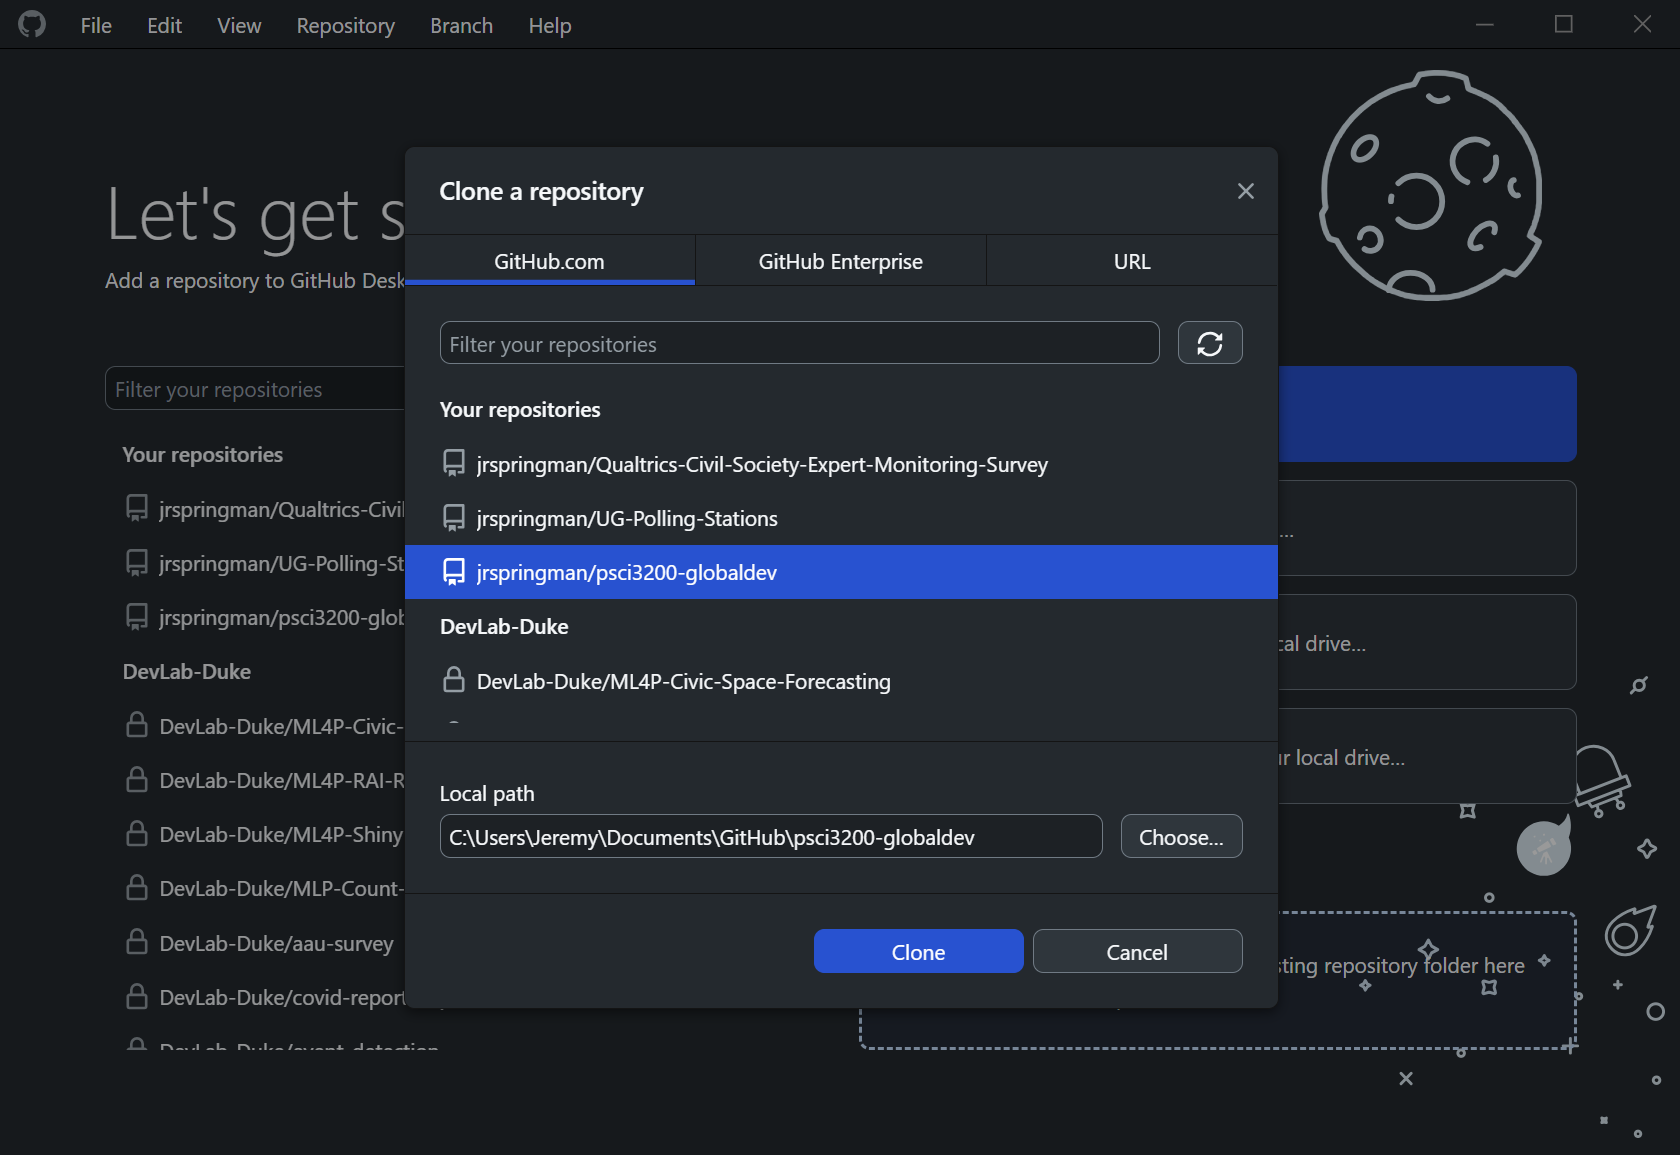
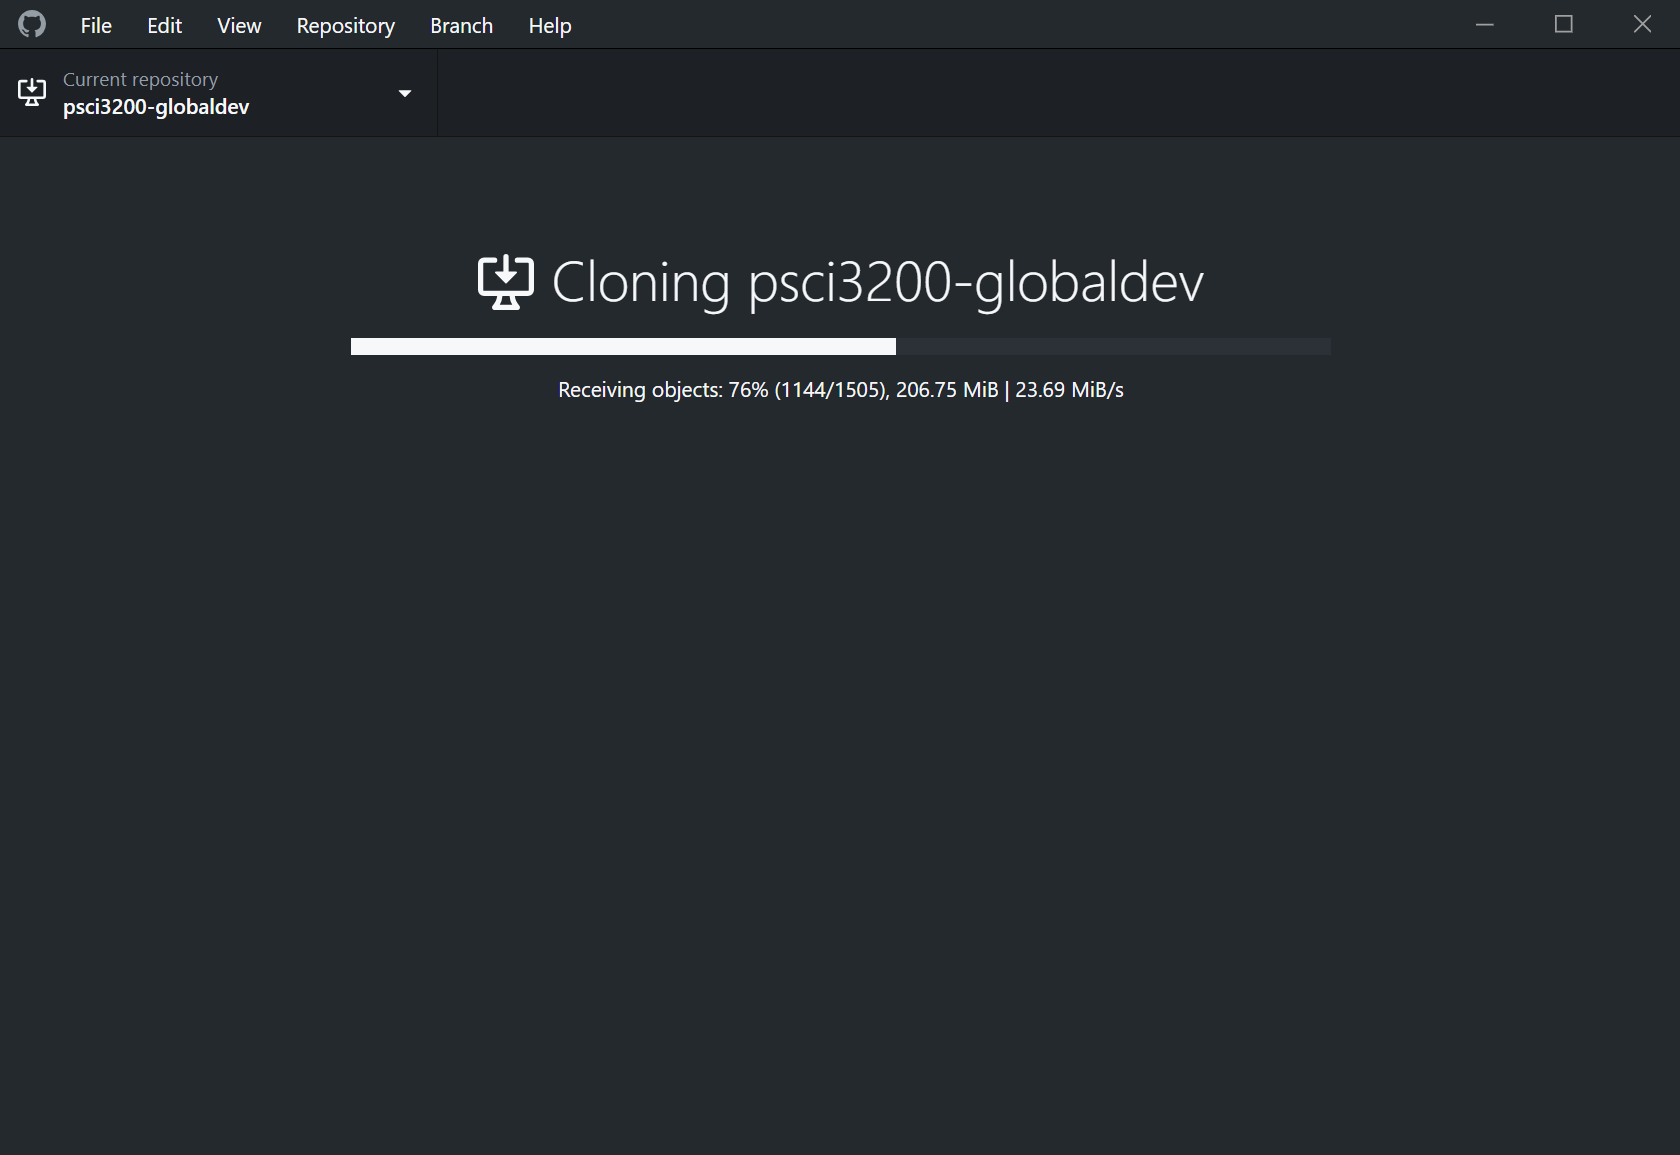
Once you have created a git repo on your Github account, you need to “clone” the remote repo to create a local copy on your harddrive. This will allow you to add files and make changes to the repo before pushing them up to the remote version
Clone your repo
Clone your repo
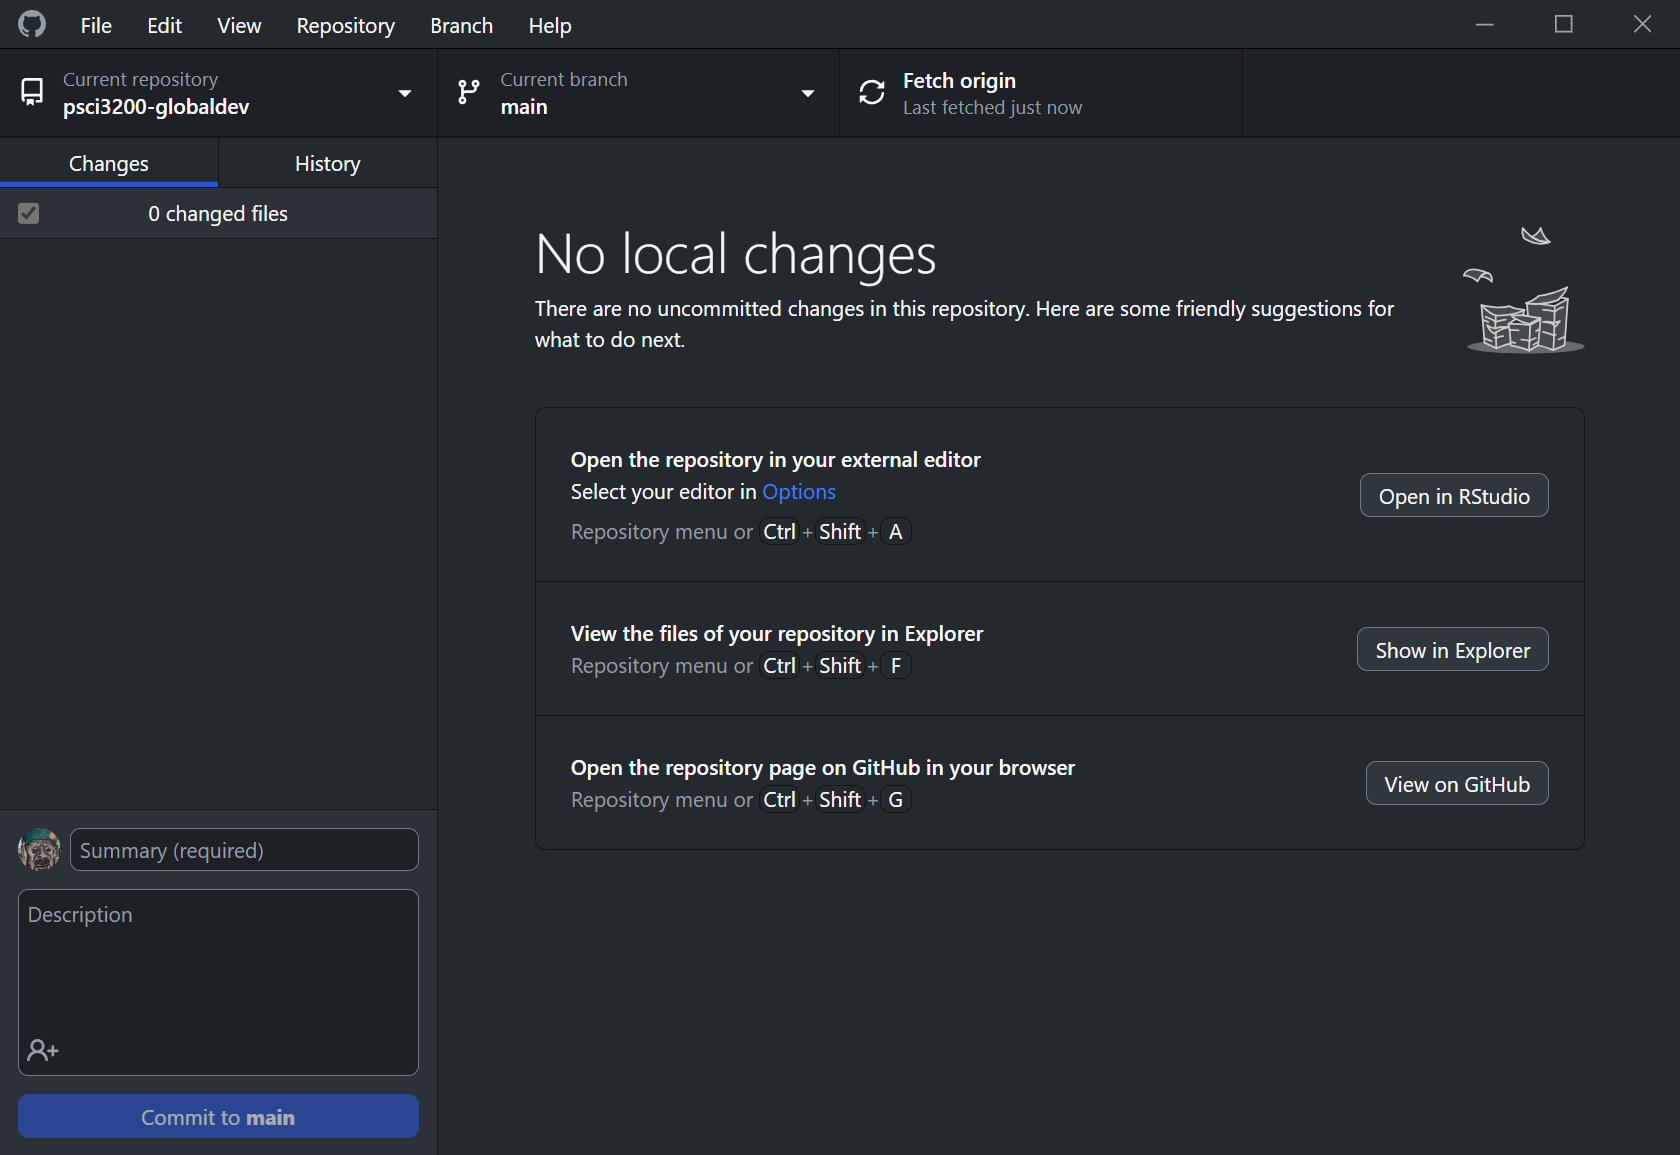
Once your repo has finished cloning, you should have a Github Desktop page for the repo that looks like this You can click the icons to open the project in RStudio, see the repo’s folder on your harddrive, or view the remote version on Github.com
Create a new repo

Commit changes
- As you make changes to the repo, they will appear as “diffs” in the app
- Add a description and make a “commit” to record those changes in git
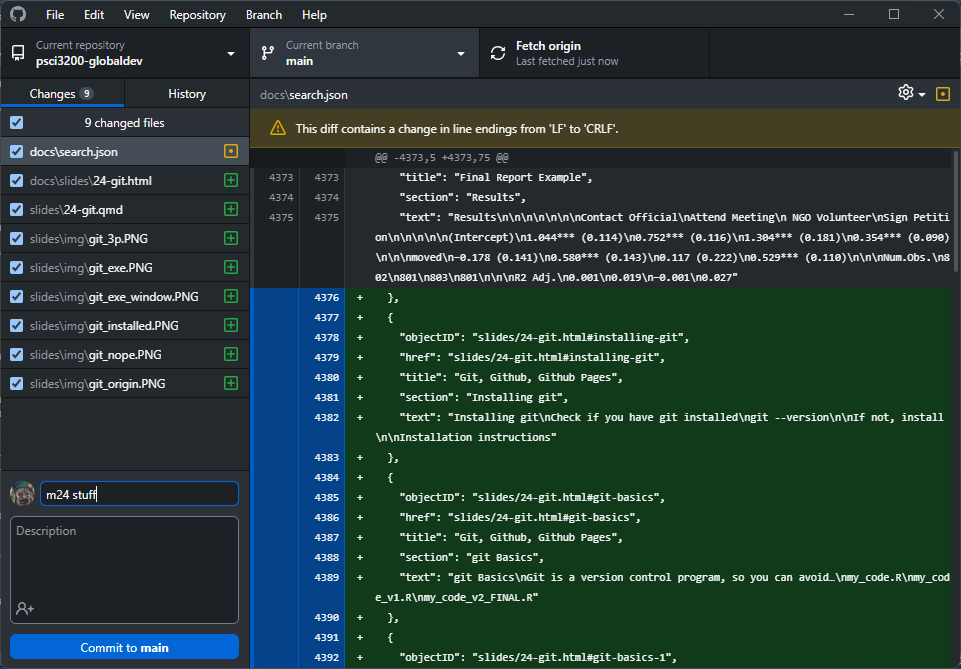
Now you can make changes to the repo, and those changes will appear as “diffs” in the application Green will indicate additions, Red will indicate deletions, and yellow will indicate changes Try adding a .R file or an empty .txt file to the repo’s folder; you should see it show up immediately on the Github Desktop app In the bottom left, enter text to describe the changes that you made and then click “Commit to main”
Push to your repo
Push those changes to the remote version on Github.com
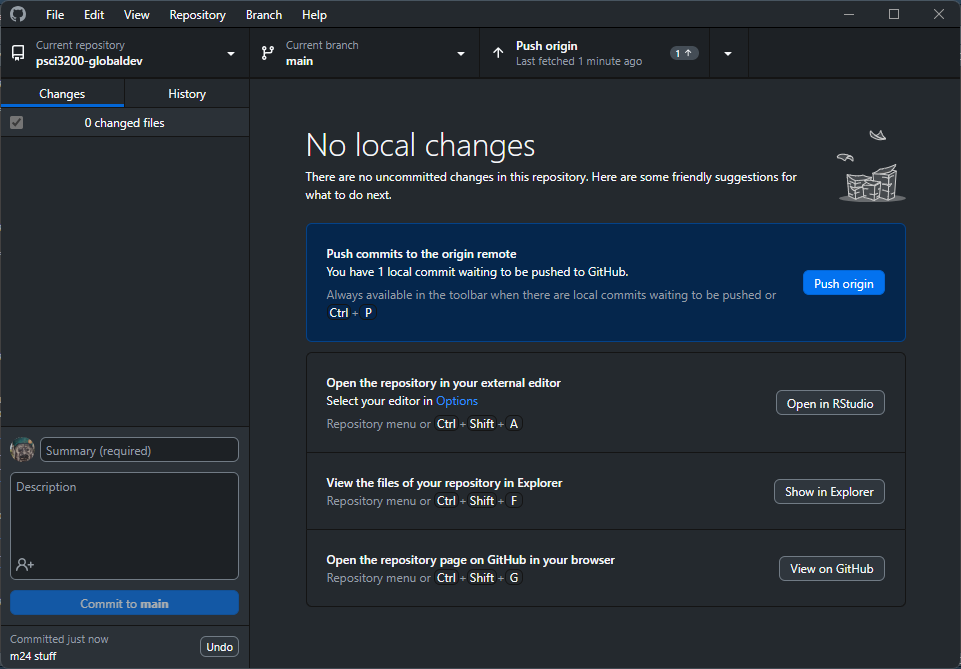
Now you have made your first commit, push it to the “origin”, which is the remote version of the repo on Github.com Those changes should now appear on the repo’s page on Github.com
Push to your repo
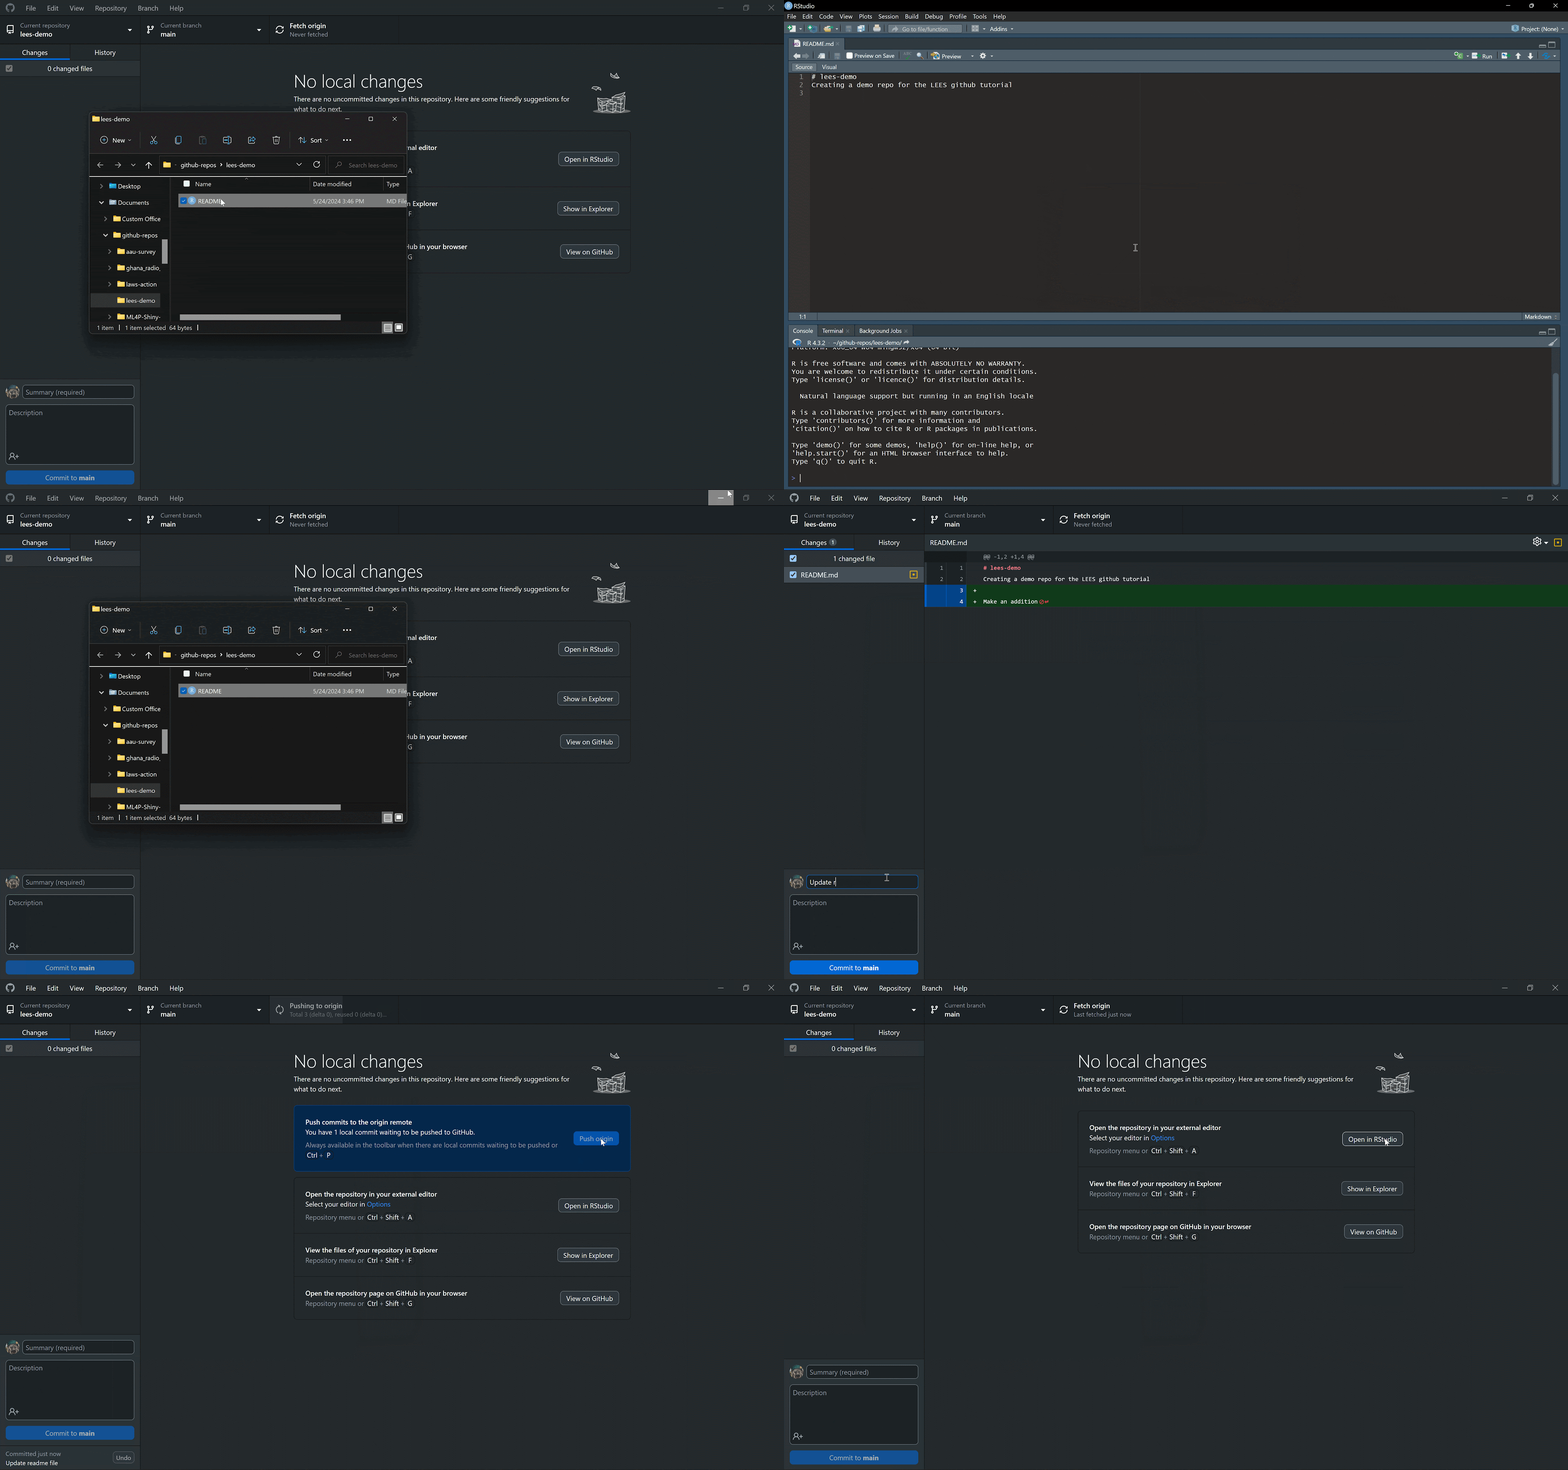
Pull from your repo
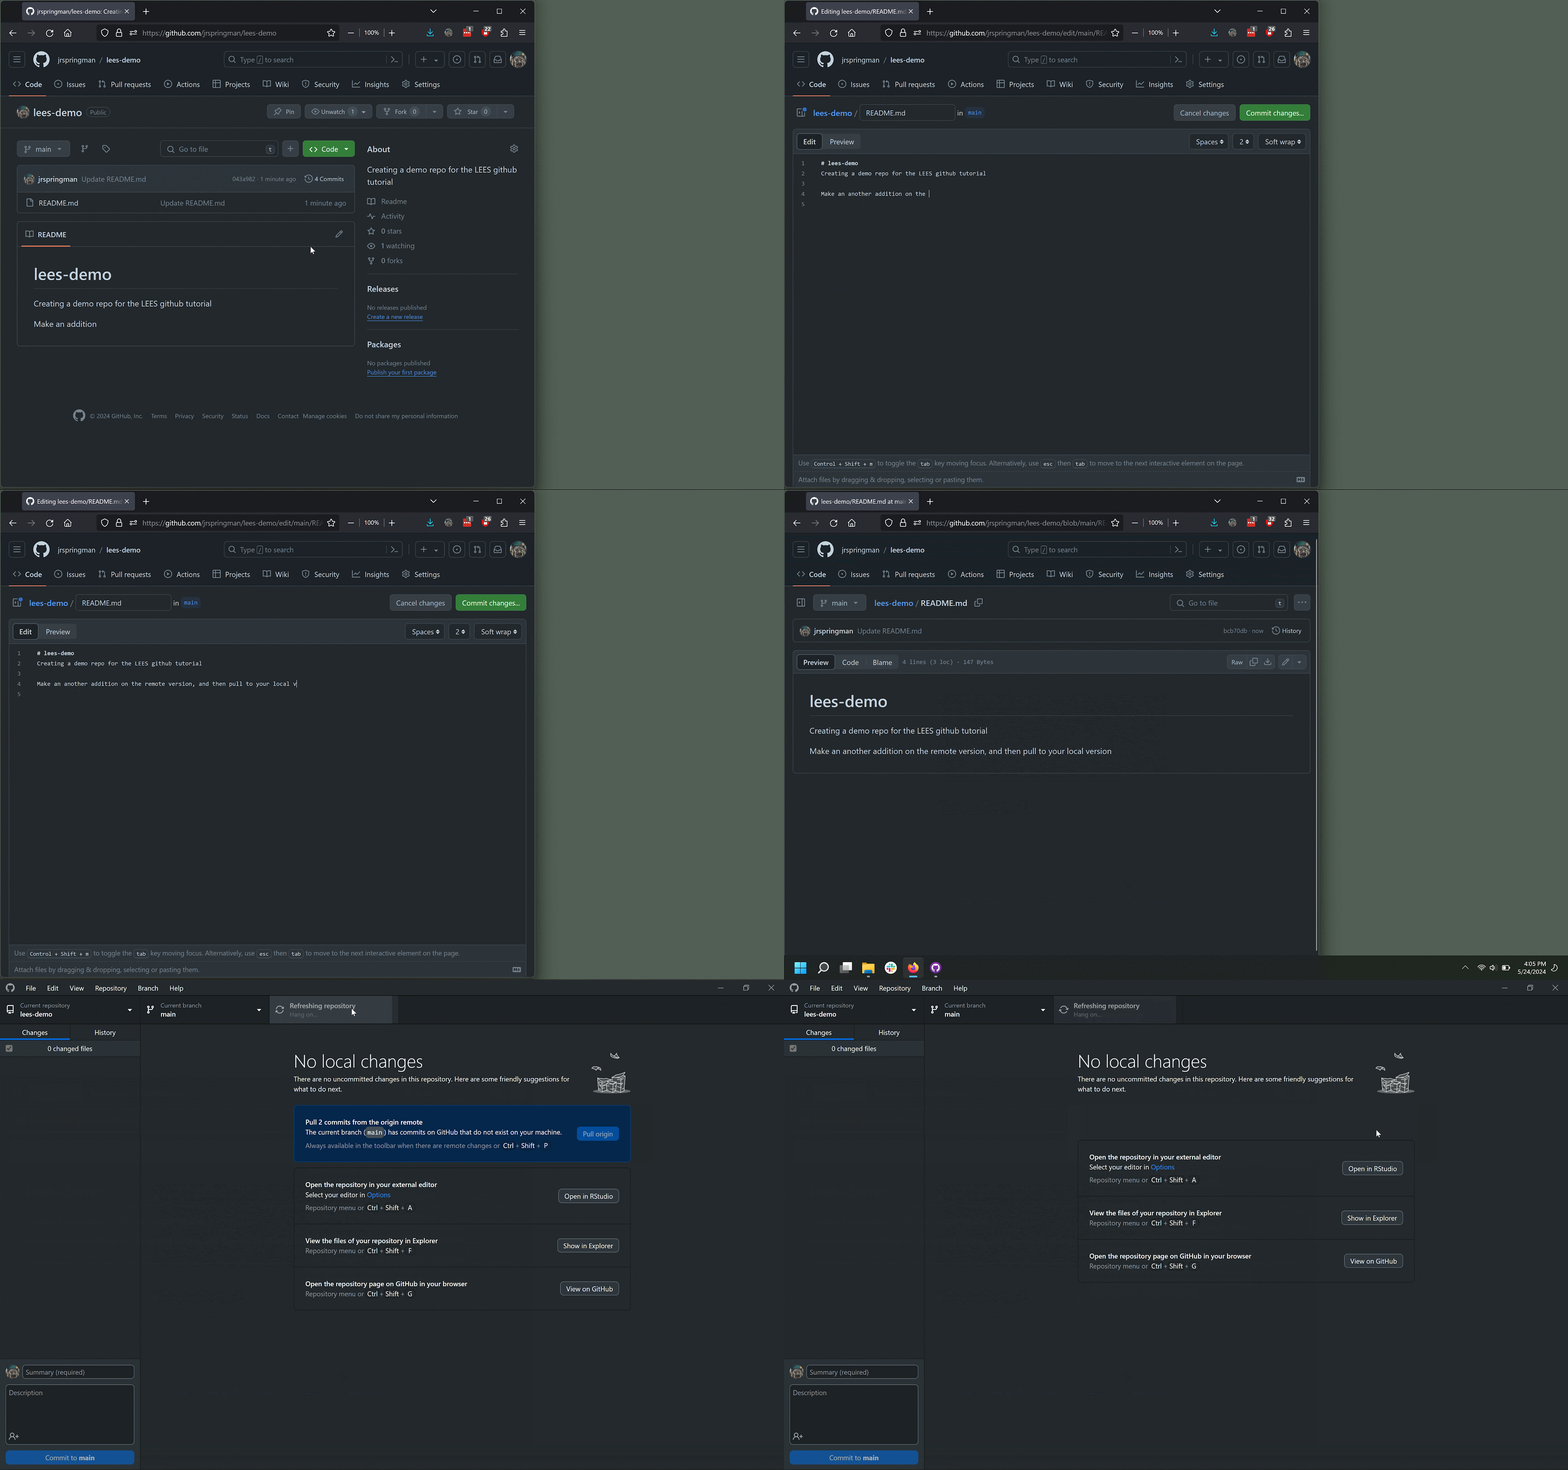
When colleagues push a commit to the repo, you can pull their commit by clicking “Pull origin”
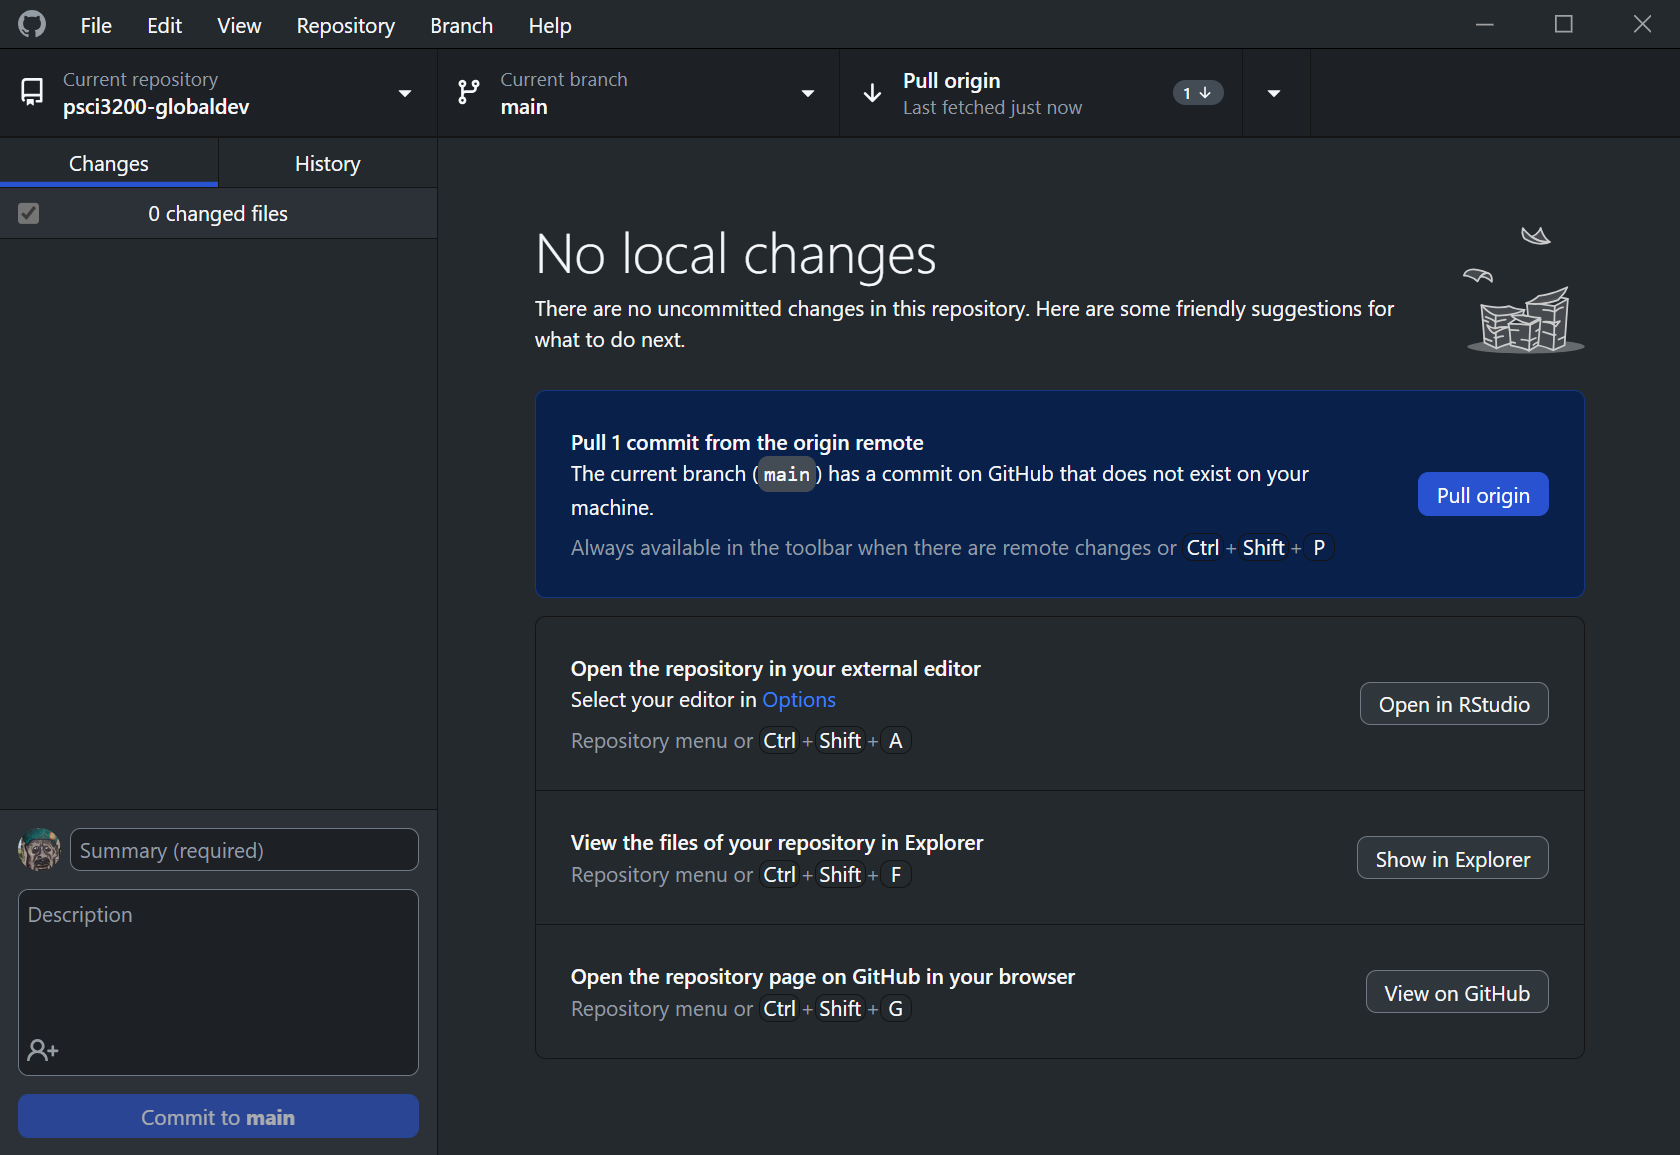
When colleagues push a commit to the repo, you can pull their commit by clicking “Pull origin” Make sure to pull any commits before you start working; this will make sure you are working on the most recent version of your project
Pull from your repo
Github Pages
Create a website
Moving to RStudio
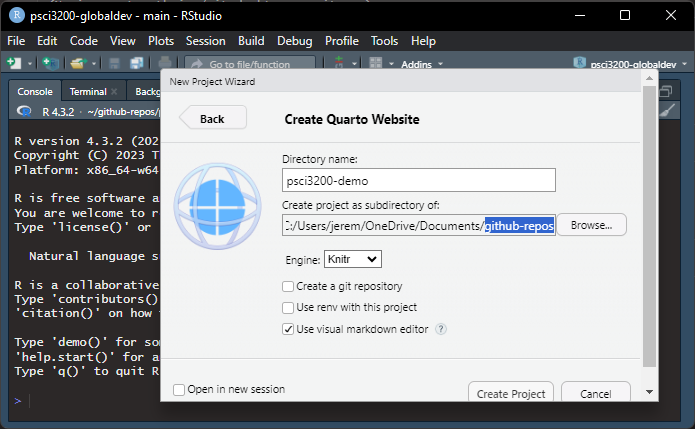
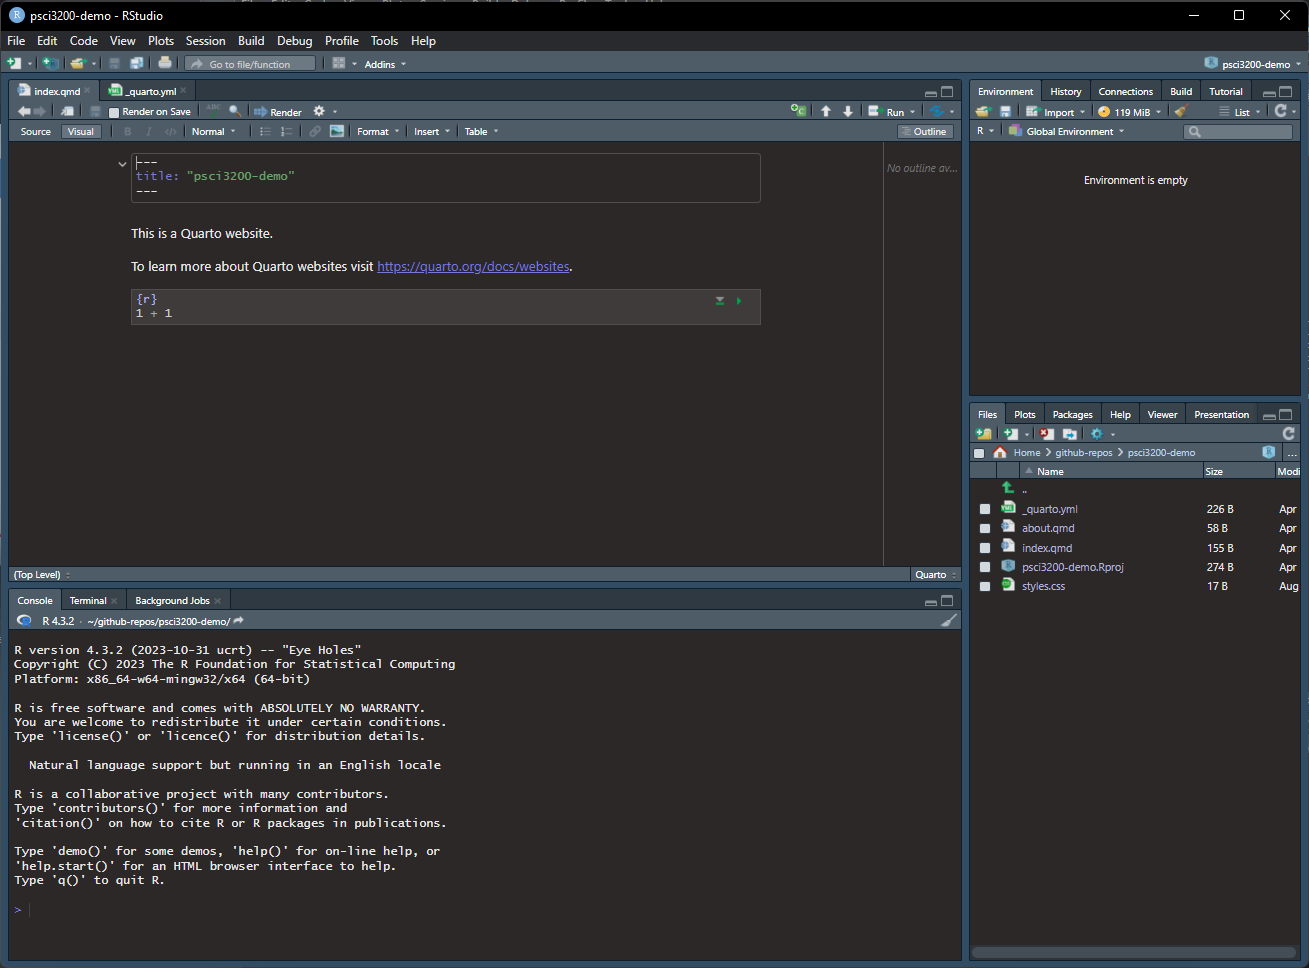
- File \(\rightarrow\) New Project \(\rightarrow\) New Directory \(\rightarrow\) Quarto Website
Create a website
Create a website
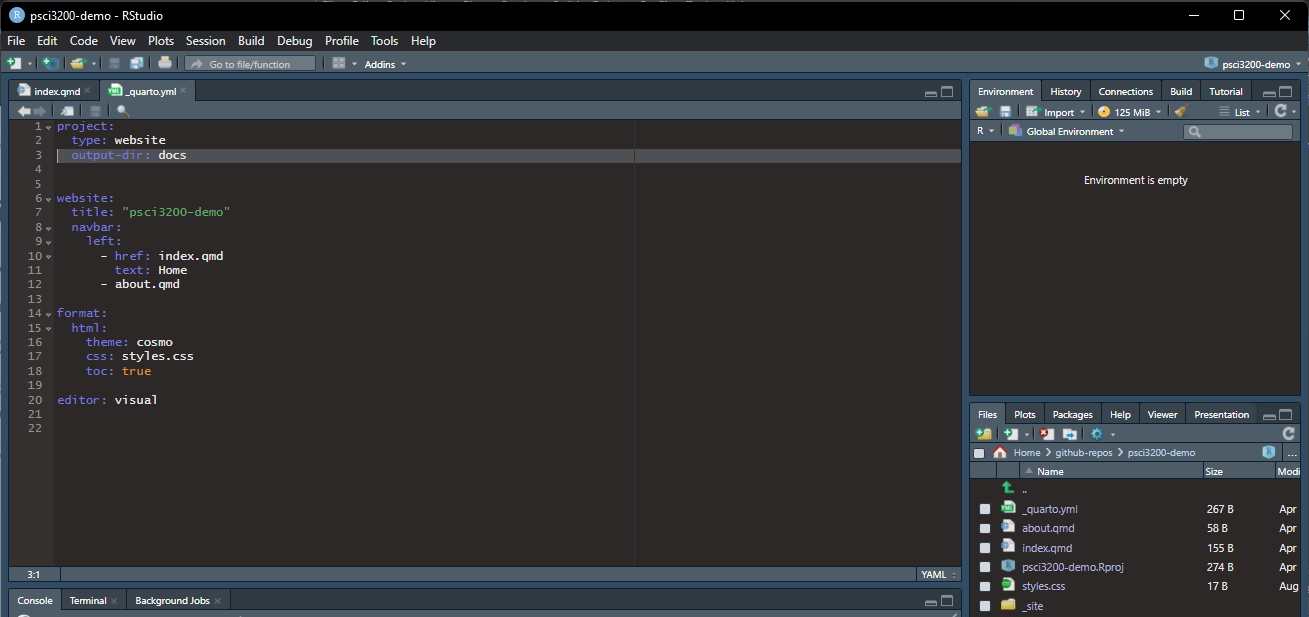
Change output director to docs
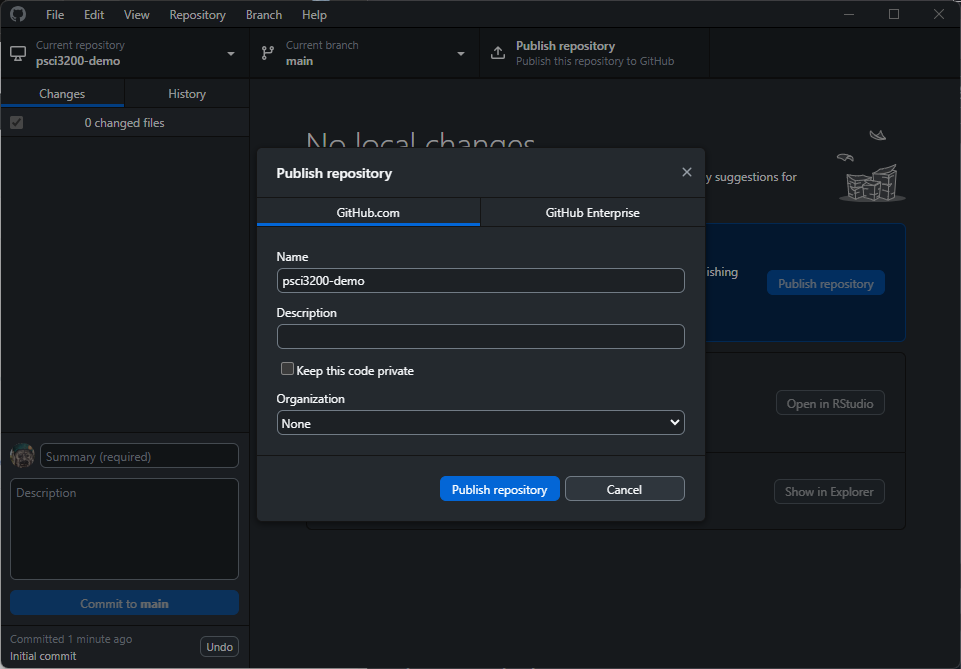
Publish to Github pages
- Keep a repository of your website
- Push changes to your website via Github
- See changes almost instantly
Publish to Github pages
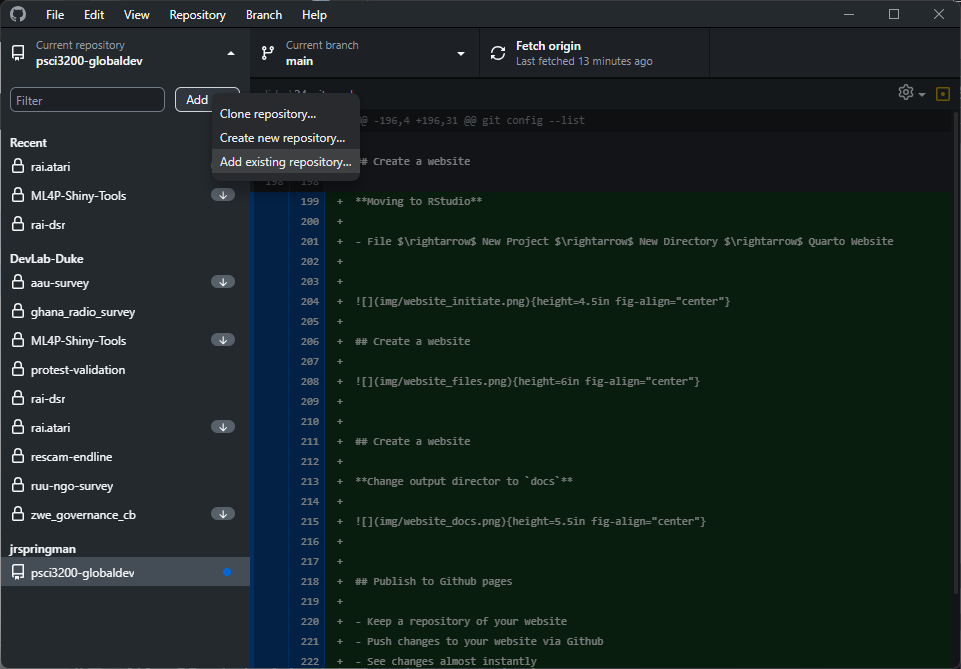
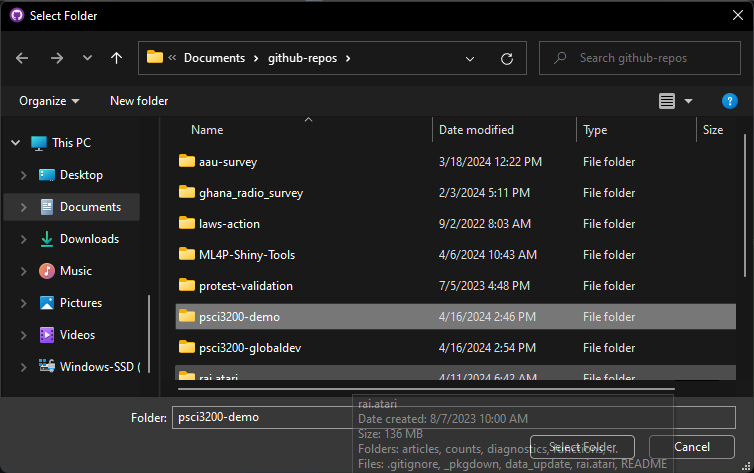
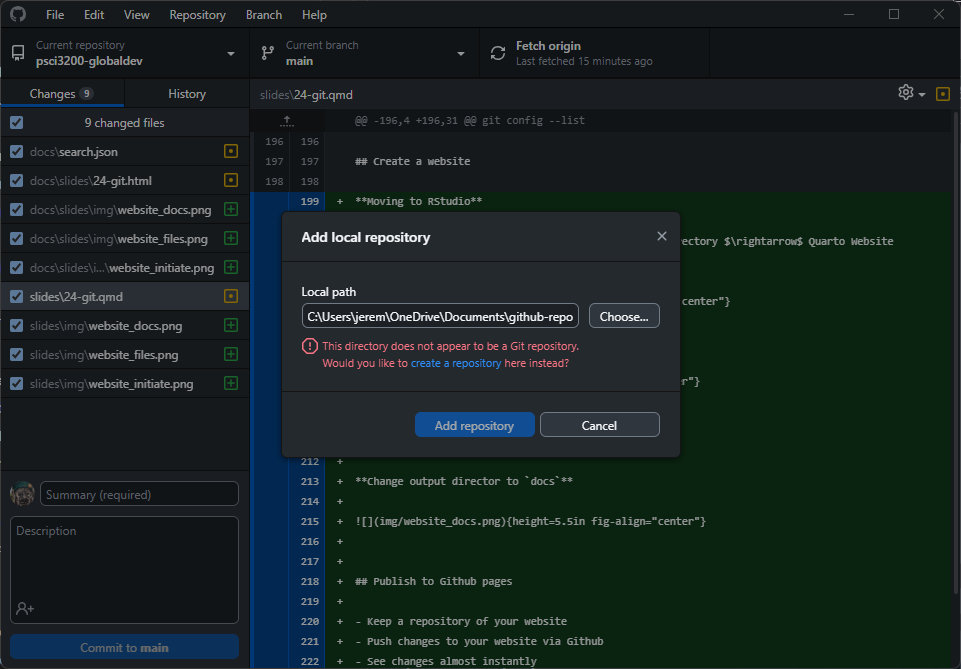
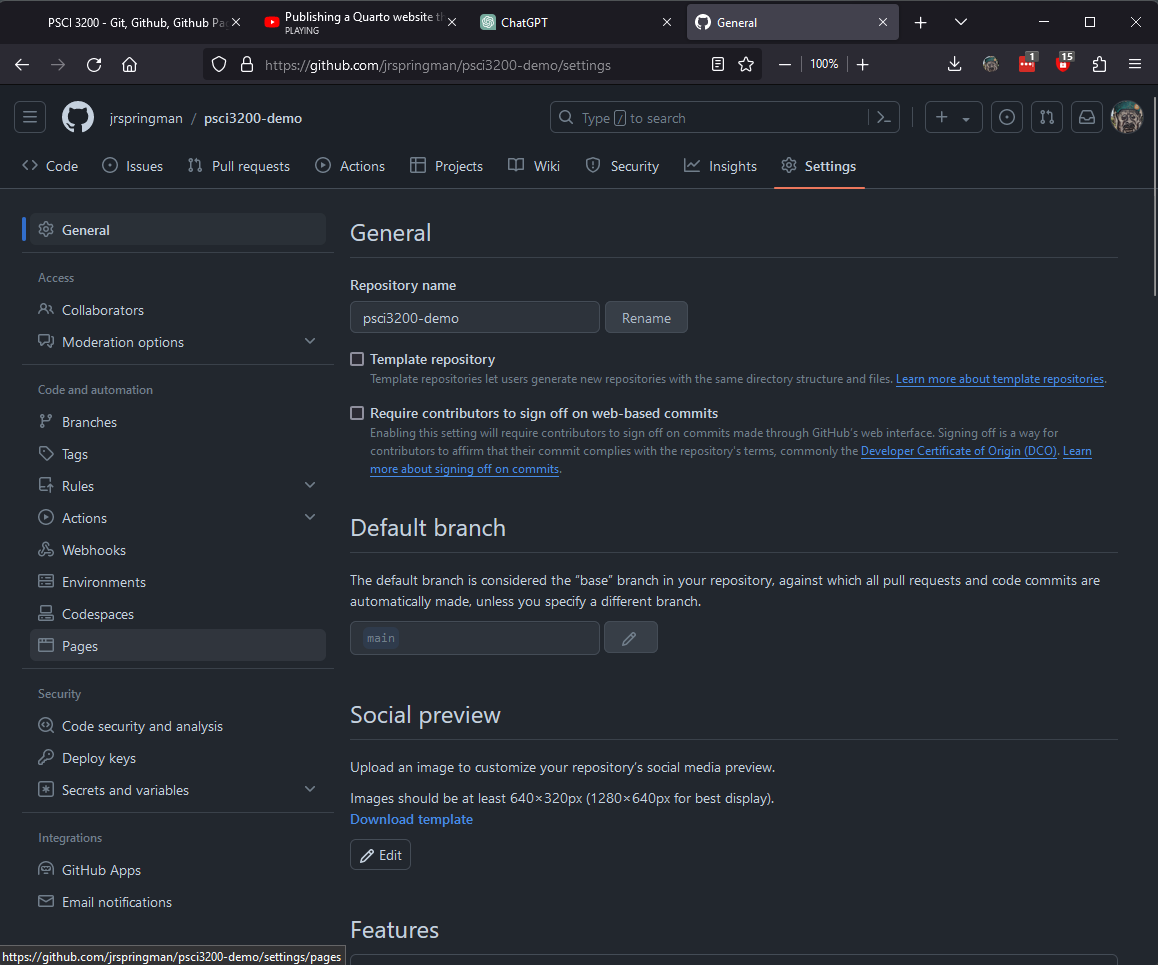
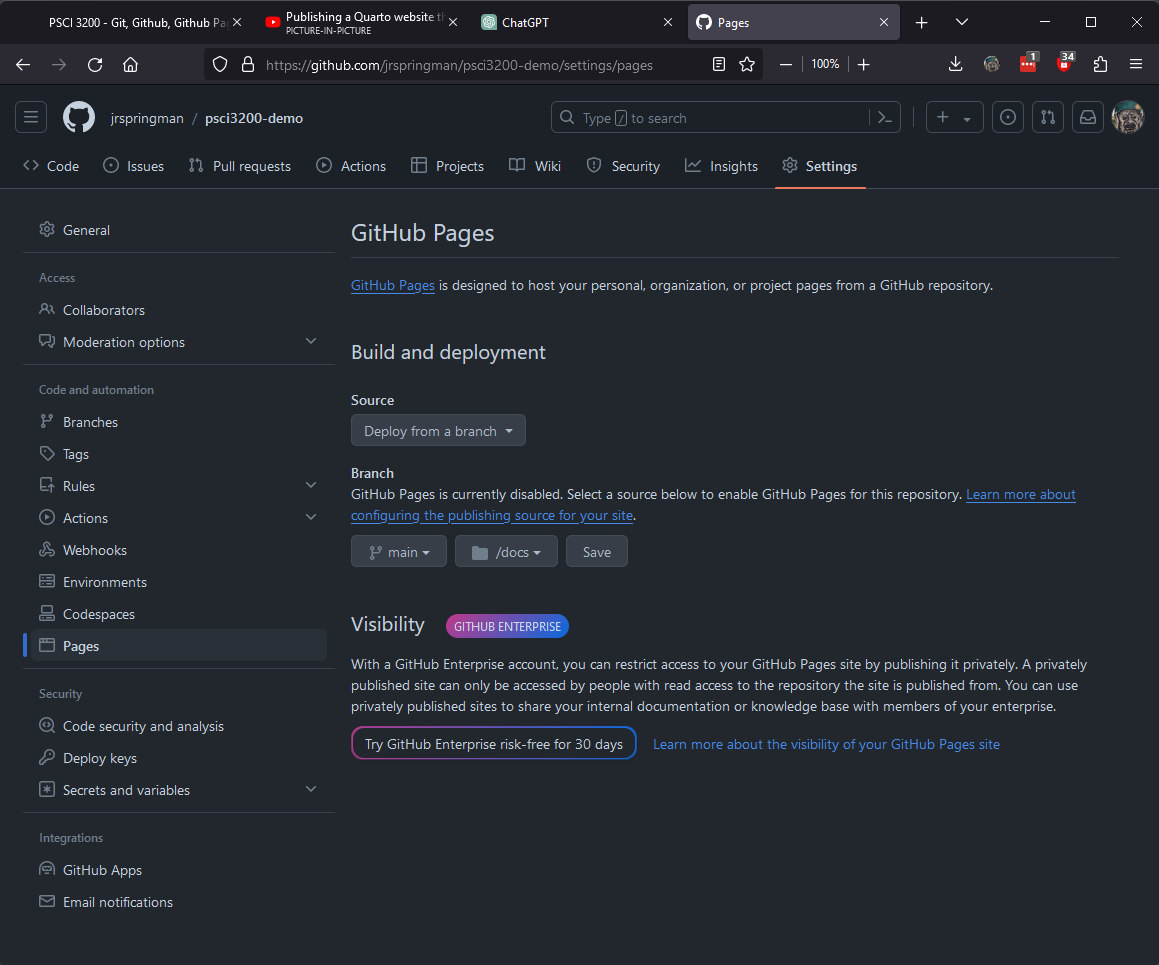
- Open repo on github.com
- Settings \(\rightarrow\) Pages (left-sidebar)
Publish to Github pages
Publish to Github pages
Publish to Github pages
Publish to Github pages
Publish to Github pages
Publish to Github pages
Host Your Final Project
- Delete
_sitefolder (now its usingdocs) - Create
datafolder to store your dataset - Add final project
.qmdfile to your repo (or drop it intoindex.qmd) - Use
_quarto.ymlto add new pages to navigation bar - Render
index.qmd; confirm that other pages have been rendered - Push commit and check that the website updated